
Glass Lamp Shades | Custom Lighting Glassware
Glass Lamp Shade Manufacturing Process
Explore our complete glass lamp shade production workflow: batch mixing, mold forming, fire polishing, precision annealing, CNC drilling & surface finishing.

Production Detailed Process Deep-Dive
Our 9-stage glass lamp shade production protocol transforms raw silica into specification-grade lighting components through controlled thermal processing , precision mechanical finishing , and multi-layer surface engineering. Each phase integrates inline QC checkpoints ensuring thermal shock resistance and structural integrity for commercial lighting applications.
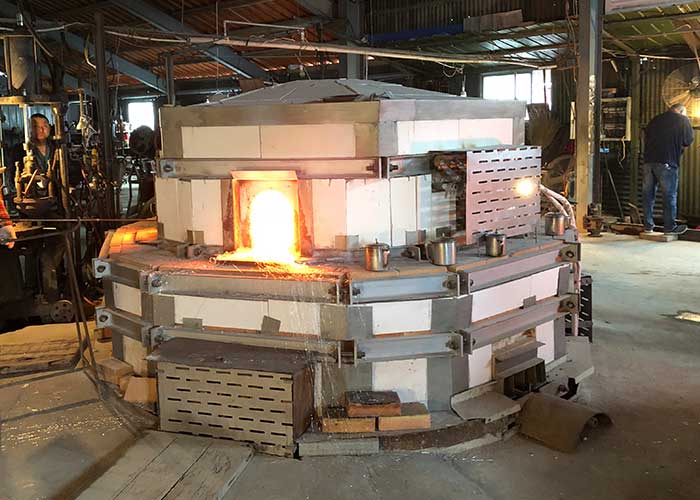
1.Orginal Material Melting in Stove
- Soda-lime glass: SiO₂ 70-74%, Na₂O 12-14%, CaO 8-10%
- Borosilicate: B₂O₃ 12-13% (thermal expansion 3.3×10⁻⁶/K)
- Colorants: Fe₂O₃ (green), CoO (blue), Se/CdS (red) – doping precision ±0.001%
“Your shade color won’t fade or shift between production batches—our spectrophotometry calibration ensures color consistency .”
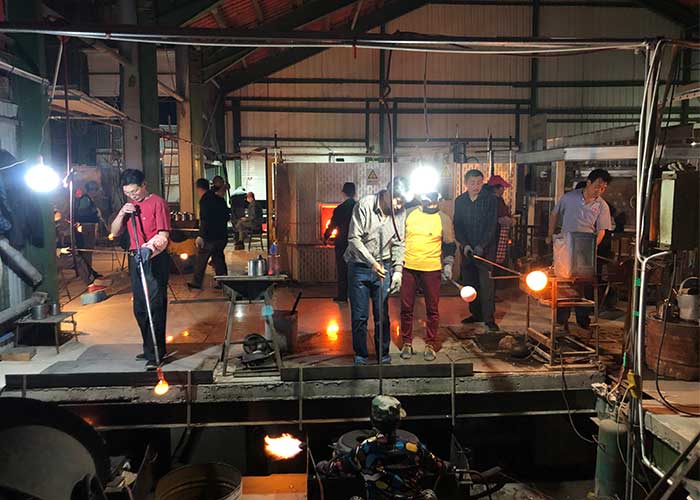
2.Thermal Forming Technologies
Mold surfaces are coated with boron nitride (BN) spray to prevent glass adhesion and extend mold life to 50,000+ cycles. For opal glass, we control the fluorine atmosphere to create uniform crystalline opacity without streaking.

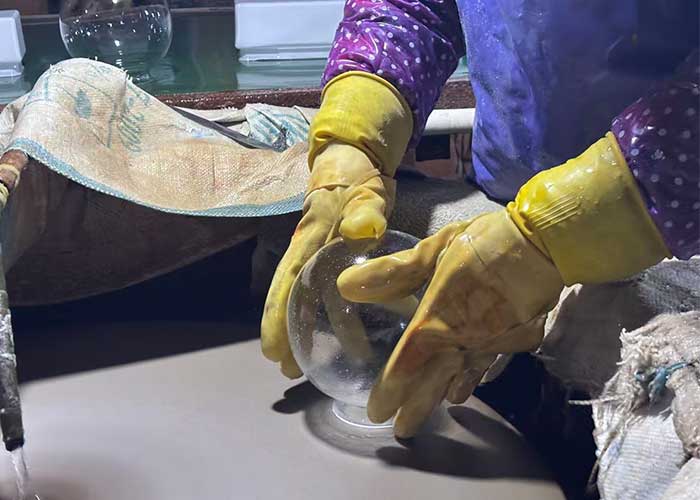
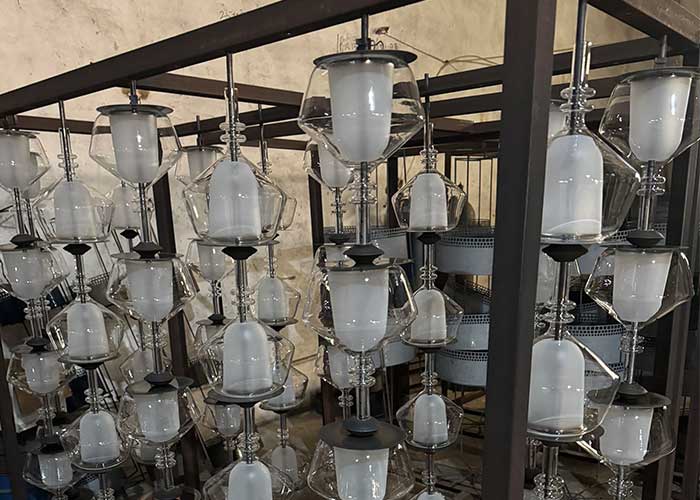
3.Stress Relief Thermal Treatment
The annealing process of glass lampshades involves heating the lampshade to a temperature slightly below its softening point (typically 500-550℃) in a controlled furnace, maintaining this temperature for a certain period to release internal stresses generated during forming, then cooling it gradually at a slow, uniform rate (usually 10-20℃/hour) to room temperature. This process prevents the lampshade from cracking due to residual stress and improves its thermal stability and durability.
4.Precision Mechanical Processing
Cutting:The cold cutting process of glass lampshades uses a precision cutting tool (such as a diamond cutter) to cut the glass lampshade at room temperature. First, mark the cutting line accurately, then apply appropriate pressure to scratch the glass surface along the line, and finally separate the glass along the scratch gently to get the required shape. It avoids thermal damage caused by high-temperature cutting and ensures the integrity of the lampshade surface.
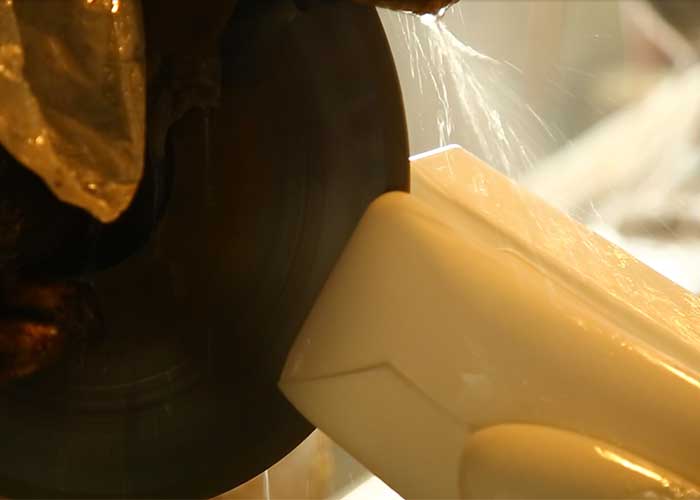
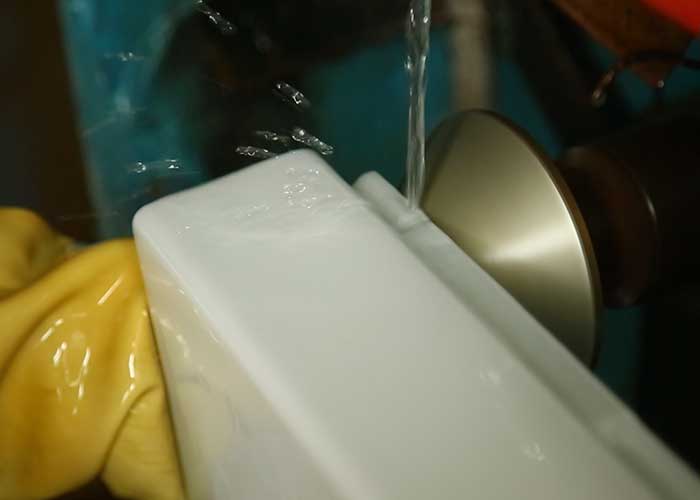
5.Rim Finishing
The process of grinding and beveling the glass lampshade opening: first, fix the lampshade firmly, then use a professional grinding tool to grind the opening edge to make it flat and smooth.
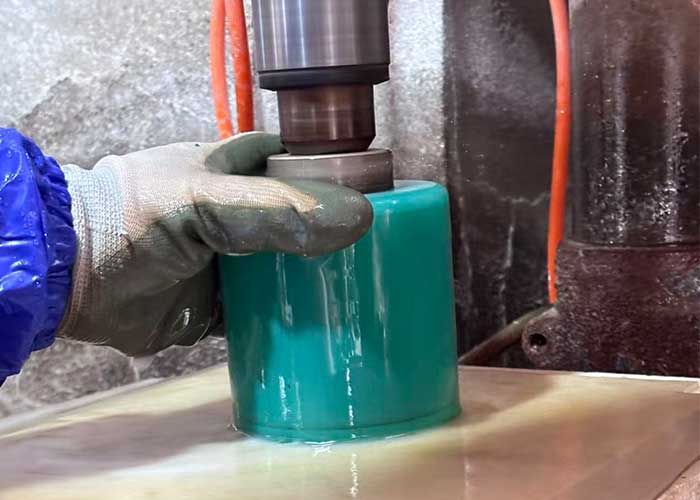
6.Drilling Hole
The drilling process of glass lampshades: first, mark the drilling position accurately on the lampshade and fix it firmly to avoid sliding. Then, use a diamond drill bit (suitable for glass) to drill at a low speed, and continuously spray water to cool the drill bit and glass, preventing cracks caused by overheating. Drill slowly and evenly until penetrating the glass, ensuring the hole is smooth and free of burrs.
7.Edge Profiling & Safety Finishing
use a beveling tool to process the edge into a smooth inclined angle, removing sharp edges and burrs, so as to ensure the safety and aesthetics of the lampshade opening.
8.Sandblasting or Acid Etching
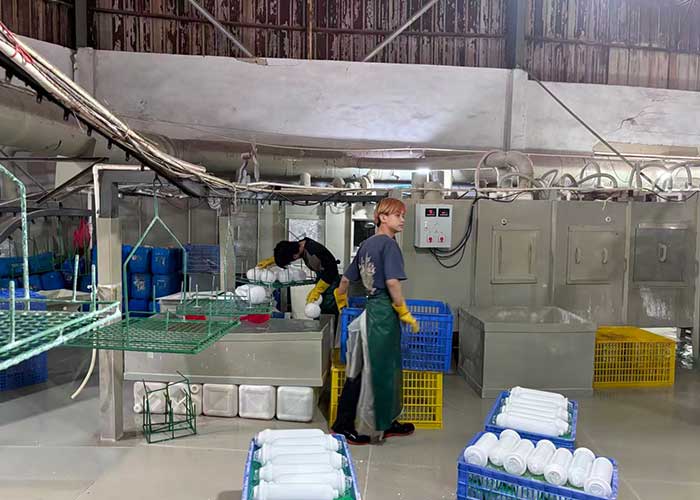
9.Surface Engineering
Common Questions
Jingxin Glassware operates six primary glass manufacturing processes in its 4,500m² Yancheng facility: mouth-blown (free-form artistic shades), lampwork borosilicate (precision torch-formed at 820°C), machine-pressed (high-volume IS-machine forming for opal globes), centrifugal spinning (uniform-wall pendant bowls), heat-bent curved (post-formed wall sconce shields), and traditional handmade off-hand glassblowing. Each process uses dedicated furnaces, annealing lehrs, and forming molds calibrated for the target glass family — soda-lime, borosilicate 3.3, or opal milk glass. Choice of process depends on geometry complexity, wall-thickness tolerance, surface finish requirements, and order volume. For B2B buyers, our engineers recommend the most cost-effective process during sample stage, balancing aesthetic intent with MOQ economics and 25-45 day production lead times for OEM/ODM projects.
The factory processes four primary glass chemistries: soda-lime glass (SiO₂ 72%, Na₂O 14%, CaO 9% — used for decorative shades and clear/colored designs), borosilicate 3.3 (B₂O₃ 13%, SiO₂ 81% — coefficient of thermal expansion 3.3×10⁻⁶/K, ASTM E438 Type I Class A compliant), opal milk glass (fluoride and phosphate opacifiers producing ~85% diffuse transmission), and lead-free crystal substitutes. Raw materials including silica sand (Fe₂O₃ <0.012%), soda ash, and boric acid are sourced from certified suppliers with batch COA documentation. Cullet (recycled glass) is incorporated at 15-30% to reduce melting energy. All formulations meet RoHS, REACH, and California Proposition 65 lead/cadmium limits, with batch traceability maintained for 24 months to support recall, audit, and buyer compliance documentation needs.
Production runs on three continuous-flow gas-fired tank furnaces (combined 45 metric tons/day capacity, operating at 1480-1550°C melting zone with 1100-1200°C working temperature), supported by six pot furnaces for short-run colored and specialty batches. Forming equipment includes two IS (individual section) press-and-blow machines for opal globes, four centrifugal spinning stations for symmetrical bowls, twelve mouth-blown gather/blow workstations with pipe warmers, and dedicated borosilicate lampwork benches with oxygen-propane torches. Annealing is performed in three continuous lehrs (4-8 hour controlled cooling from 560°C to ambient) preventing residual stress. CNC engraving, sandblasting frosting booths, and color-coating spray lines provide downstream finishing. Equipment maintenance follows TPM (Total Productive Maintenance) protocols with documented PMs every 720 operating hours.
Jingxin Glassware holds ISO 9001:2015 quality management certification (certificate audited annually by SGS), ISO 14001:2015 environmental management, and is SMETA 4-pillar audited covering labor, health/safety, environment, and ethics. Product-specific compliance includes RoHS 2.0, REACH SVHC screening, California Proposition 65, FDA 21 CFR 175.300 for food-contact glass, and CE marking documentation for EU electrical lighting fittings. Quality control follows AQL 2.5 (general) or AQL 1.5 (critical visual) per ANSI/ASQ Z1.4 sampling tables, with documented inspection at five stages: raw material incoming, hot-end forming, post-annealing, finishing, and final packing. Each export carton includes batch number, inspection report, and packing list — supporting buyer’s import customs documentation and downstream traceability requirements for retailers and lighting brands.
Mold development follows a structured eight-step workflow: (1) 2D drawing or 3D STEP file review by engineering team, (2) DFM (design for manufacturability) feedback within 5 working days noting draft angles, wall thickness, and parting-line constraints, (3) tooling quotation with mold cost ranging $400-$2,800 depending on complexity and cavity count, (4) graphite or cast-iron mold CNC machining in 25-35 days, (5) first-article sampling with 3-5 prototype pieces, (6) dimensional and aesthetic approval cycle, (7) PPAP-equivalent documentation handover, and (8) production release. Molds are buyer-owned after full payment and stored free of charge for three years with active production. Mold life expectancy is 80,000-200,000 cycles depending on glass family and forming process, with refurbishment available at 30-40% of new mold cost.
Combined factory output capacity is approximately 4.5 million pieces annually across all processes, with daily capacity of 12,000-15,000 pieces depending on product mix. Machine-pressed lines run 24/7 at 3,000-4,500 pieces per shift; mouth-blown and lampwork output at 80-150 pieces per artisan per shift. Order scheduling uses an MRP system batching by glass color, mold compatibility, and ship date — typical lead time is 25 days for in-stock designs and 35-45 days for new OEM tooling. Peak season (Aug-Nov for holiday/Christmas lighting market) requires 15-30 days extra lead time; buyers are advised to confirm forecasts by July. Rush production at 1.3× standard price compresses lead time by ~30%, useful for replenishment or trade-show samples requiring rapid turnaround.
Standard packaging is foam-lined 5-ply corrugated export cartons with individual product polyethylene bags and EPE foam inserts, designed to pass ISTA 3A drop and vibration testing. Per-carton quantity is optimized for 20-25kg gross weight to comply with manual handling regulations. Pallet configuration uses heat-treated ISPM-15 compliant wooden pallets with stretch-wrap and corner protectors, typical 600-1,200 pieces per pallet. Shipping options include FOB Shanghai/Ningbo for full-container loads (20’GP holds ~6,000-9,000 pieces; 40’HQ holds ~14,000-20,000 pieces), LCL consolidation for smaller orders, and door-to-door DDP service via partner forwarders. Custom retail-ready packaging — printed master cartons, color boxes, hang tags, barcodes (UPC/EAN) — is available with artwork approval and 7-10 day additional lead time.
Documented defect rate across all production lines averages 1.2-1.8% (vs industry benchmark 3-5%), measured at final QC and tracked monthly on SPC control charts. Defect categories include stones/cord (raw material), bubbles >2mm, off-center forming, scratches, chips, and color variation outside ΔE 2.5 tolerance. Pre-shipment inspection covers 100% of critical-finish products and AQL 2.5 sampling for general decorative items, with photo documentation provided to buyers on request. Quality claims must be submitted within 60 days of arrival with photos, batch numbers, and defect quantity; valid claims are resolved via free-of-charge replacement in next shipment or credit note. Third-party inspection services (SGS, Bureau Veritas, Intertek) are welcomed at buyer cost — Jingxin coordinates inspector access and provides batch samples on request.
Sustainability measures include 22-28% cullet (recycled glass) incorporation reducing batch melt energy by 8-12%, regenerative furnace heat recovery capturing ~35% exhaust heat, and waste heat used to preheat raw materials. The factory operates on 30% solar-supplemented electricity (180kW rooftop PV installed 2022) and water recirculation for cooling reduces freshwater draw by 65%. Glass cullet from in-house defects (~1.5% of output) is 100% reintroduced to the batch. Packaging uses FSC-certified corrugated cardboard and recyclable LDPE film. The factory tracks Scope 1 and Scope 2 emissions for buyers’ Science Based Targets initiative (SBTi) reporting, providing kgCO₂e per kilogram of finished glass on request. ISO 14001:2015 environmental management certification ensures continuous improvement against documented environmental aspect registers.
Yes — current R&D and production capability covers four emerging trends: (1) smart-lighting compatible shades engineered for thermal load from 9-15W LED modules with photometric tests verifying luminous transmission and beam angle, (2) ultra-thin (1.5-2.5mm) wall lightweight designs reducing freight cost and supporting installation in modular ceiling systems, (3) biophilic and organic-form shades using mouth-blown free-form techniques for hospitality and high-end residential, and (4) circular-economy designs with cullet content up to 35% and end-of-life recyclability documentation. The engineering team works with lighting brands on integrated solutions — driver compatibility, IES file generation, ENERGY STAR luminaire qualification support, and DLC Premium fixture submissions. Lead time for new development typically 60-90 days from brief to production-approved sample, with NDA available before drawings/specifications exchange.