Acid Etching vs Sandblasting vs Frost Spray: Diffusion Quality Compared
For a production glass shade, compare acid etching and sandblasting as ways to texture the glass itself. Treat frost spray as a coating system that needs its own adhesion, temperature and cleaning approval. None of the three has a universal diffusion score: select the finish using the intended light source, shade geometry and acceptance limits.
A shade that looks evenly white on the sample shelf may reveal the LED outline once it is mounted. This guide helps lighting production managers and technicians compare source hiding, useful light output and repeatability for residential and hotel fixtures. It focuses on qualifying a three-process finish choice before releasing an order.
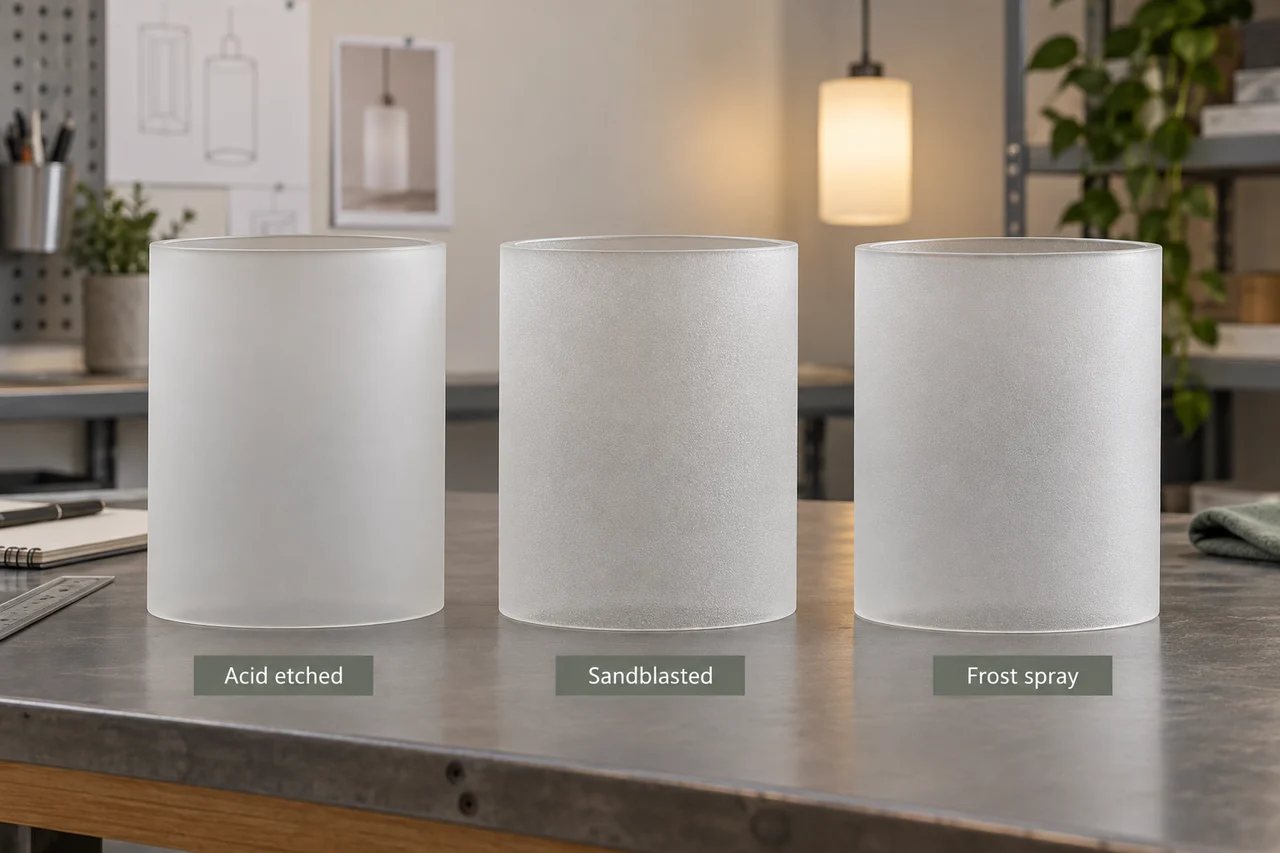
What changes when glass is etched, blasted or sprayed?
Acid-etched glass
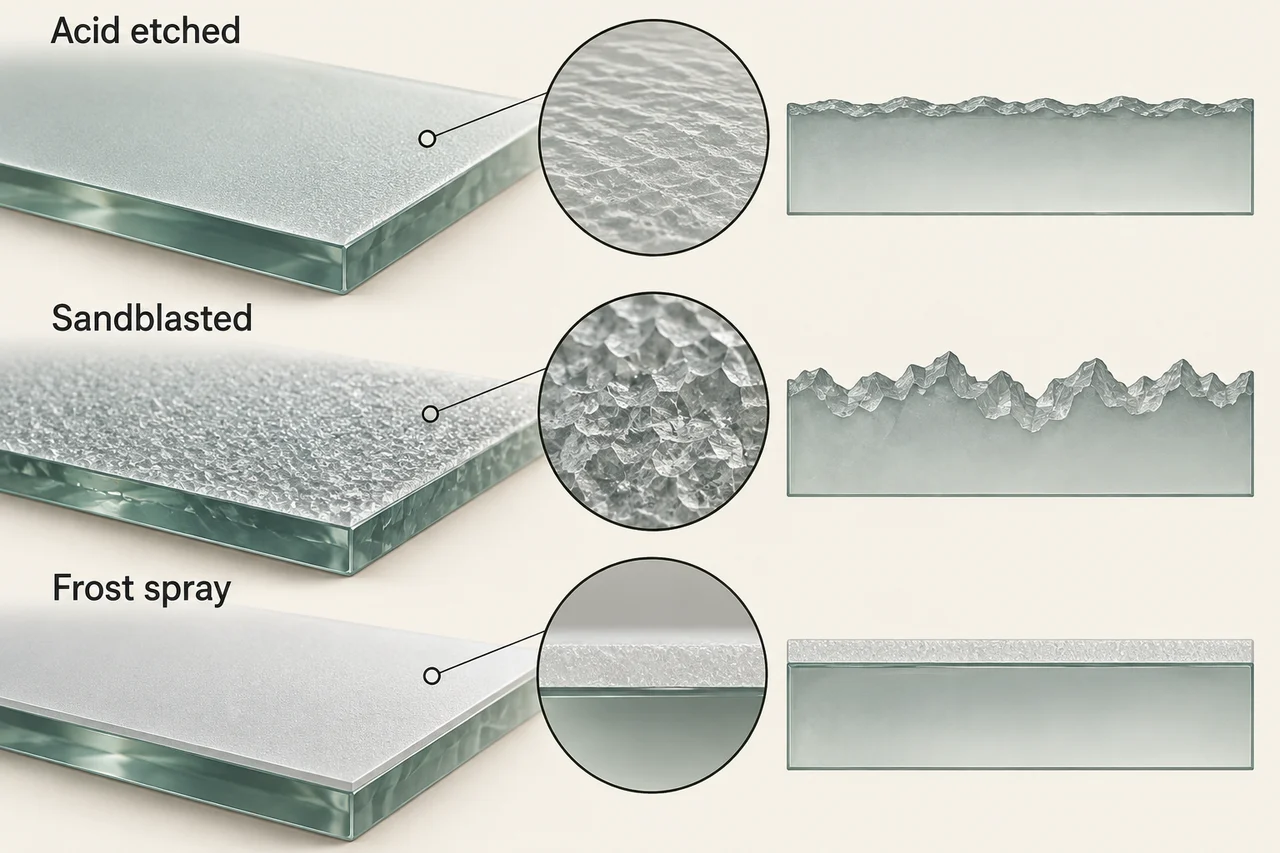
Chemical treatment modifies the glass surface. A fine satin finish is a useful candidate when a product needs a restrained, uniform appearance. Specify the actual finish reference and treated face; the word “acid-etched” alone does not define opacity, roughness or transmission.
Sandblasted glass
Abrasive treatment changes the surface mechanically. It gives the supplier control over local frosting, patterns and texture, but the approved result still depends on the media, coverage and handling process. A finely blasted finish can differ substantially from a coarse decorative one.
Frost spray
A spray deposits a layer onto the glass. The resulting frost depends on the coating formulation and film formation as well as the substrate. Distinguish a consumer decorative aerosol from a supplier-qualified industrial coating; approval of one does not establish suitability of the other.
Sans Soucie’s fabrication comparison explains the chemical and abrasive routes. For lampshades, use that process distinction to ask a more specific question: is the light-scattering surface bare textured glass, sealed glass, or a deposited coating? Record every additional sealer because it changes the system being approved.
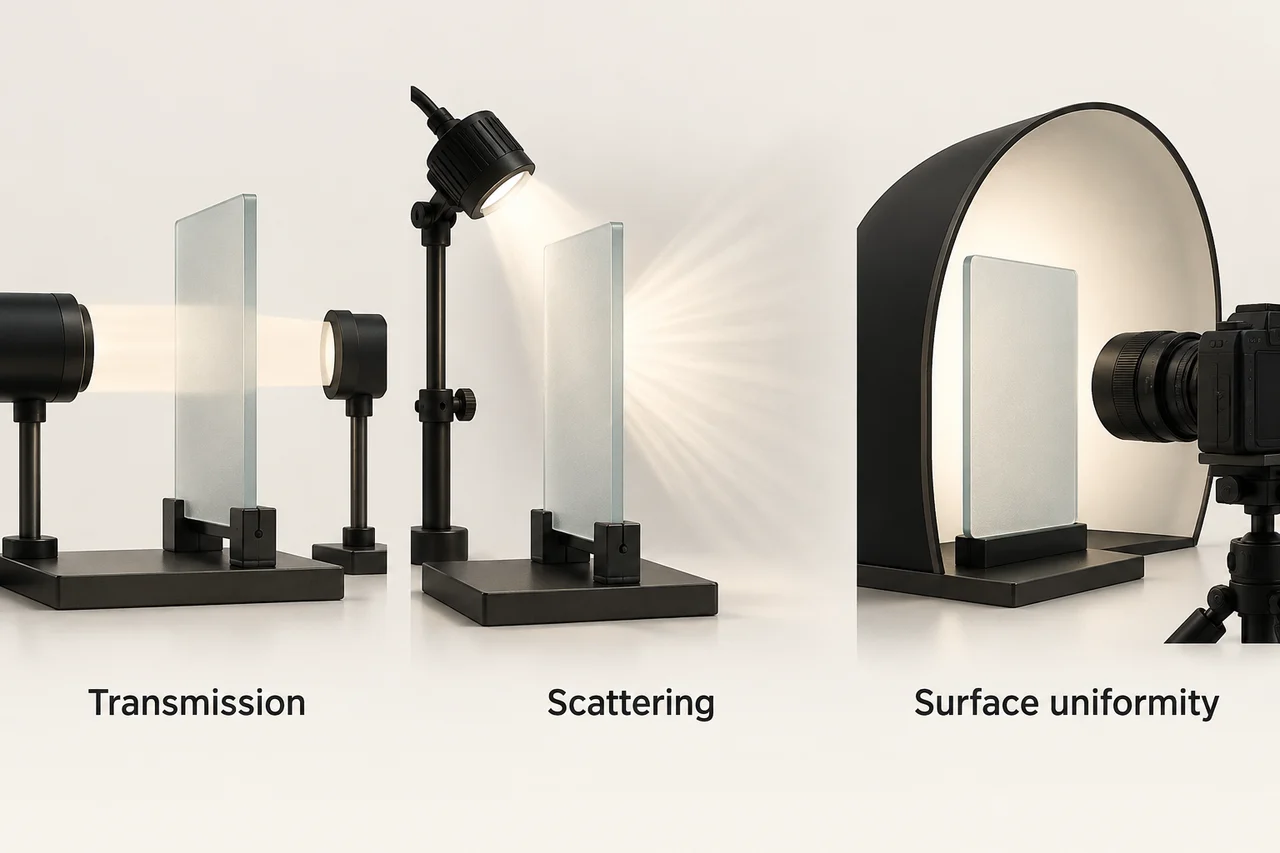
Judge diffusion with separate optical measurements
Use three separate observations: how much light passes through the sample, how that light spreads, and how evenly the assembled shade appears. A high transmission value can coexist with a visible source. Strong source hiding can also reduce the light available where the fixture needs it.
Haze describes scattering under a defined measurement geometry. It is not a direct reading of hotspot visibility or room glare. ASTM D1003-21 addresses luminous transmittance and haze of planar light-transmitting materials; its scope directs materials above 30% haze to Practice E2387. A curved frosted lampshade therefore needs a laboratory-agreed method, rather than an unexplained D1003 number.
ASTM E2387-19 describes angular optical-scatter measurement, including transmissive scatter. It allows curved specimens but requires an appropriate coordinate system and measurement geometry. Ask the lab to identify the face, location, wavelength conditions and specimen support used in its report.
For sourcing decisions, request coupon data where it is useful for process control and fixture data for the assembled product. Keep those reports separate. Do not convert a coupon’s transmission into a promised fixture lumen output.
Build a fair three-finish sample comparison
Start with matching glass blanks. If one sample has a different composition, wall profile or shape, the comparison includes those changes. Record them before attributing the difference to finishing.
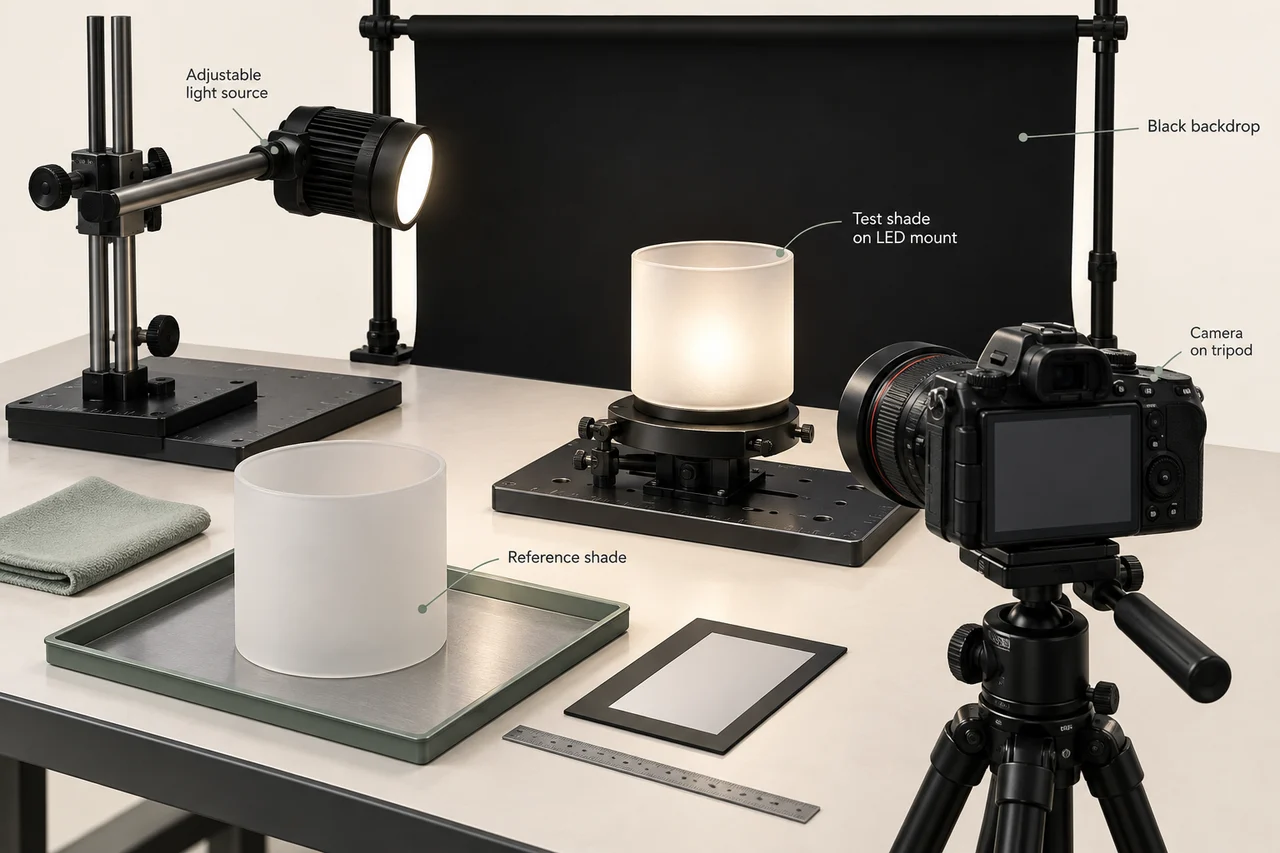
- Identify the source model, driver, operating setting and approved warm-up condition. Use the same source and mounting position for each sample.
- Record the shade drawing revision, wall measurements, treated face and any sealer or coating.
- Fix the fixture orientation, observation distance, ambient light and background. Switch off unrelated lights that could alter the assessment.
- Measure each sample, remove it and reinstall it for a repeat check. This reveals whether mounting variation is dominating the result.
- Retain a reference sample and the raw records. Do not approve only a compressed photograph sent through messaging software.
Lock camera exposure and white balance for comparative images, and avoid clipped highlights. Use calibrated photometric equipment for numerical acceptance: an ordinary camera can help document appearance, but its automatic processing can conceal a bright patch or change the apparent tint.
Request samples from the proposed production route. A hand-finished presentation sample does not establish what the batch process will deliver.
Compare hotspot visibility at the buyer's viewing angles
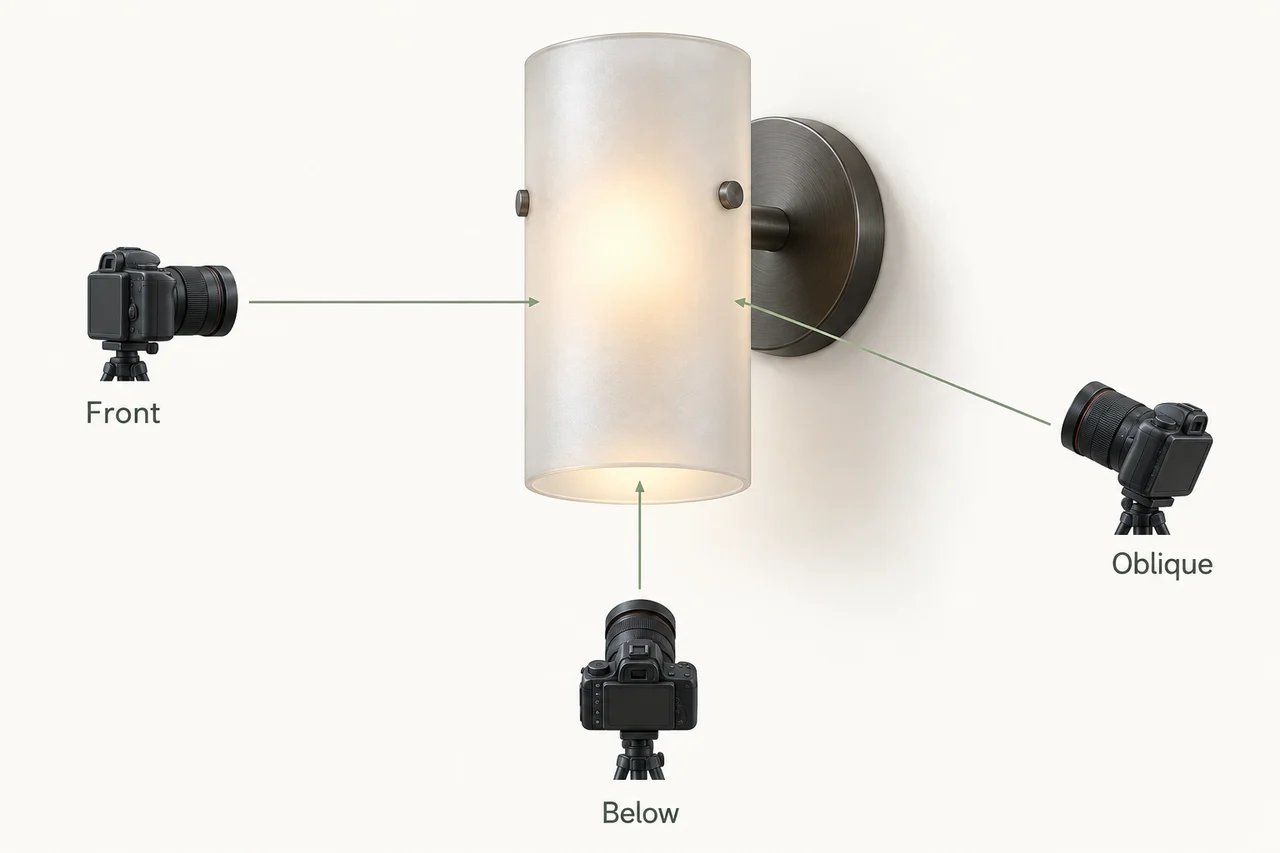
Inspect a bedside sconce from the bed, the doorway and below the fitting. Inspect a pendant from seated and standing positions. A front photograph can miss a visible LED at an open lower rim or a bright stripe near a mounting feature.
Define the visible region of interest before measurement. Include the decorative body, but identify openings and intentionally clear bands separately. Keep the same sampling locations for every finish. Otherwise a comparison can improve simply because the brightest area was excluded.
One useful project metric is a defined luminance ratio, Lmax/Lmin, over that fixed region. This is a proposed comparison tool, not a universal pass limit. For a hypothetical sample measured at 120 and 60 cd/m², the ratio is 2.0. Another at 90 and 60 cd/m² gives 1.5. The second is more uniform under those conditions, but the figures say nothing about total fixture output.
Agree the acceptable ratio and visual defects with the buyer after reviewing the intended fixture. Keep the minimum reading above the instrument’s reliable measurement floor.
Check source spacing before specifying a heavier frost
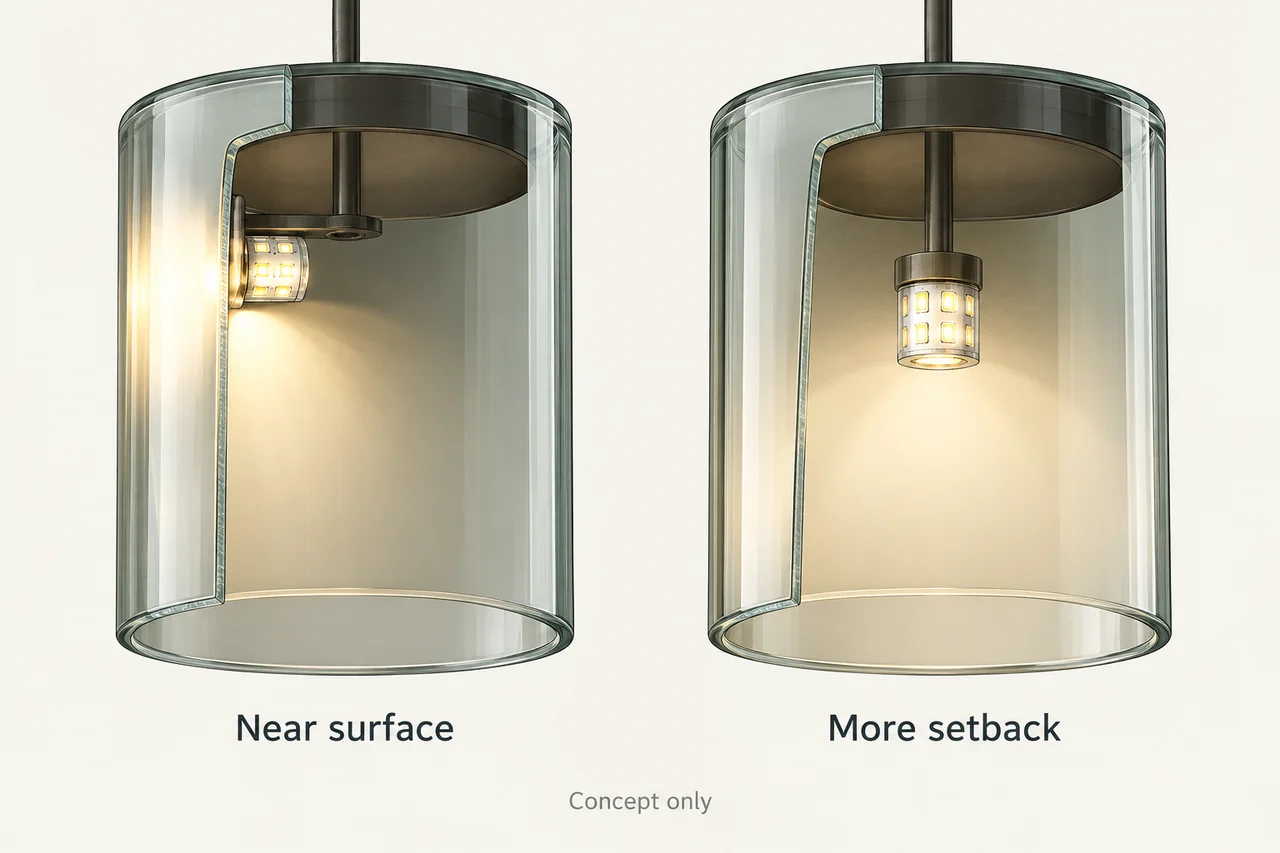
If all three finishes show the same bright region, investigate the source-to-glass distance and source distribution. A small intense emitter close to one wall is a different optical problem from a larger source positioned centrally.
Run a controlled spacing trial within the fixture’s permitted design envelope. Change one variable at a time and record both appearance and output. Increasing the frost until the LED disappears may create an unacceptable loss of useful light; changing geometry may offer a better trade-off.
For a hypothetical engineering review, keep the chosen finish unchanged and compare two permitted LED positions. If the bright region moves with the source, that observation supports a geometry investigation. It does not prove the finish is free from defects. Rotate the shade separately to see whether a mark follows the glass.
Use the broader glass lampshade optical-performance guide for adjacent design questions. Approve the final source and shade together, including replacement lamp restrictions where the design uses a replaceable lamp.
When is frosted glass spray a suitable production option?
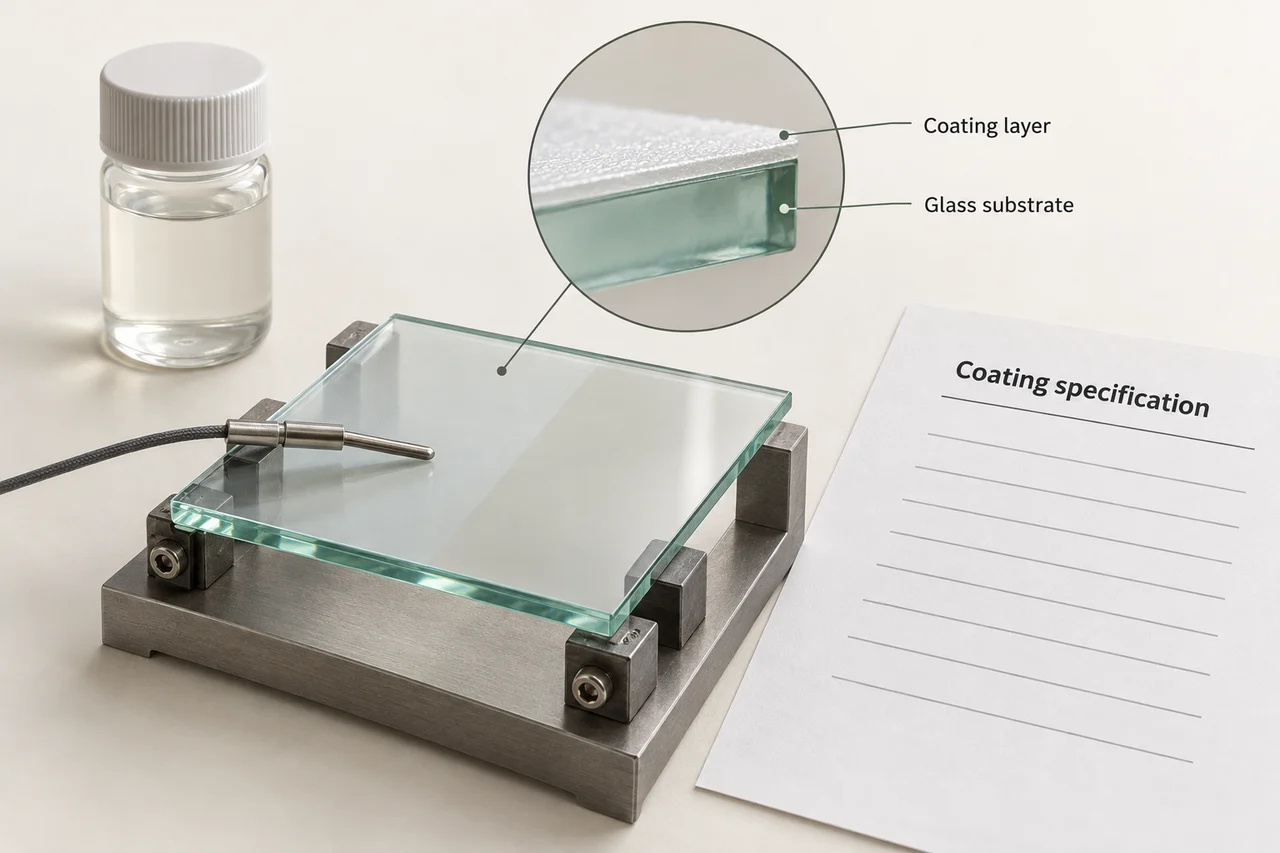
Frost spray is worth evaluating when the project accepts a coating and the supplier can document its service conditions. A quick visual mock-up can establish a design direction. Production release needs evidence for the exact coating, substrate preparation and drying or cure process.
Read the product identity and revision on the data sheet. Rust-Oleum’s Specialty Frosted Glass sheet, revision 052121, lists 200°F (93°C) dry heat resistance for that product. This is a product-specific document, not permission to use any frost spray at that temperature, and not a luminaire approval. Obtain the current sheet for the actual supplied formulation.
Record the highest coating-surface temperature in the intended fixture and have the supplier assess exposure duration, cycling and local heating. Include the film’s adhesion and appearance after exposure. The glass substrate may remain intact while the coating changes.
Ask for thermal evidence as well as a room-temperature appearance sample. For the thermal workstream, use the enclosed-fixture heat qualification guide and agree the complete assembly test with the responsible laboratory.
Protect fitters, contact bands and assembly tolerances
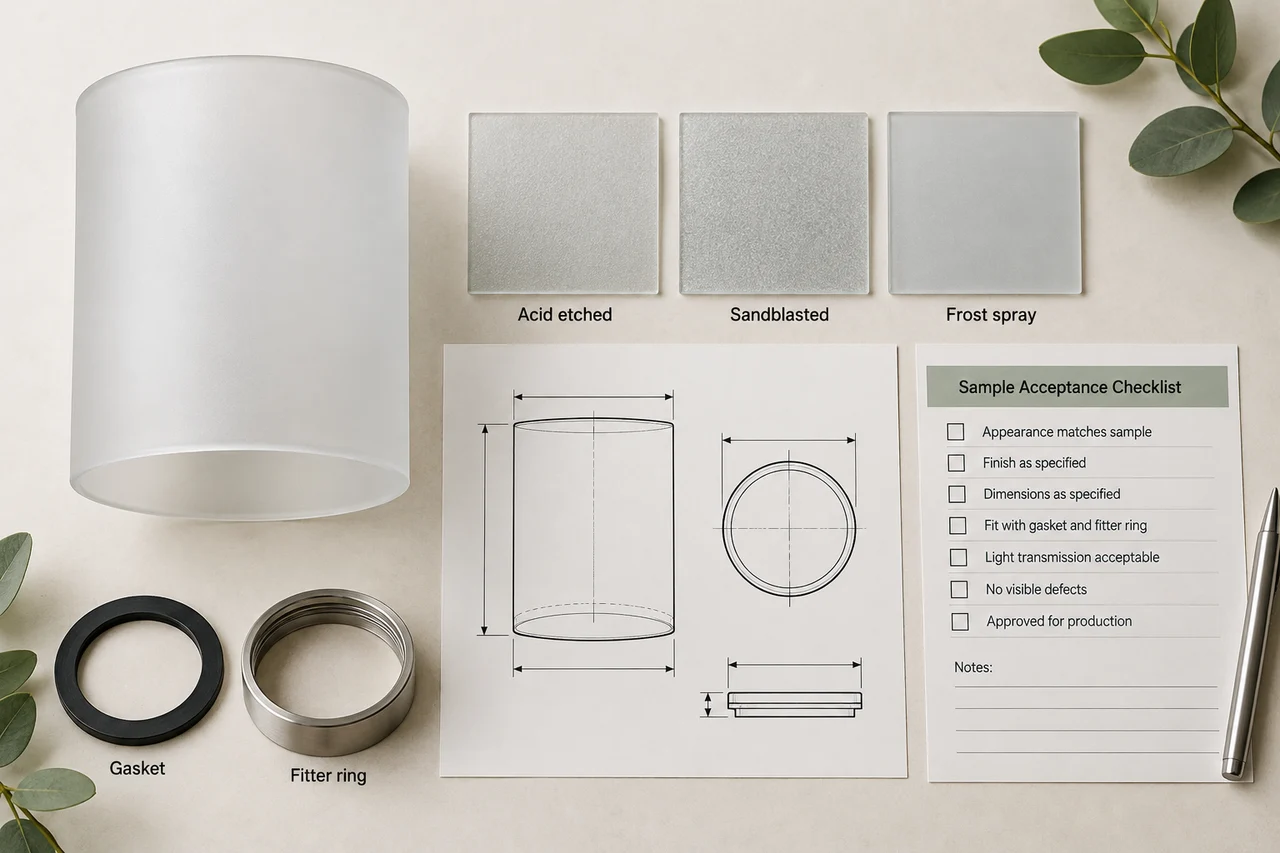
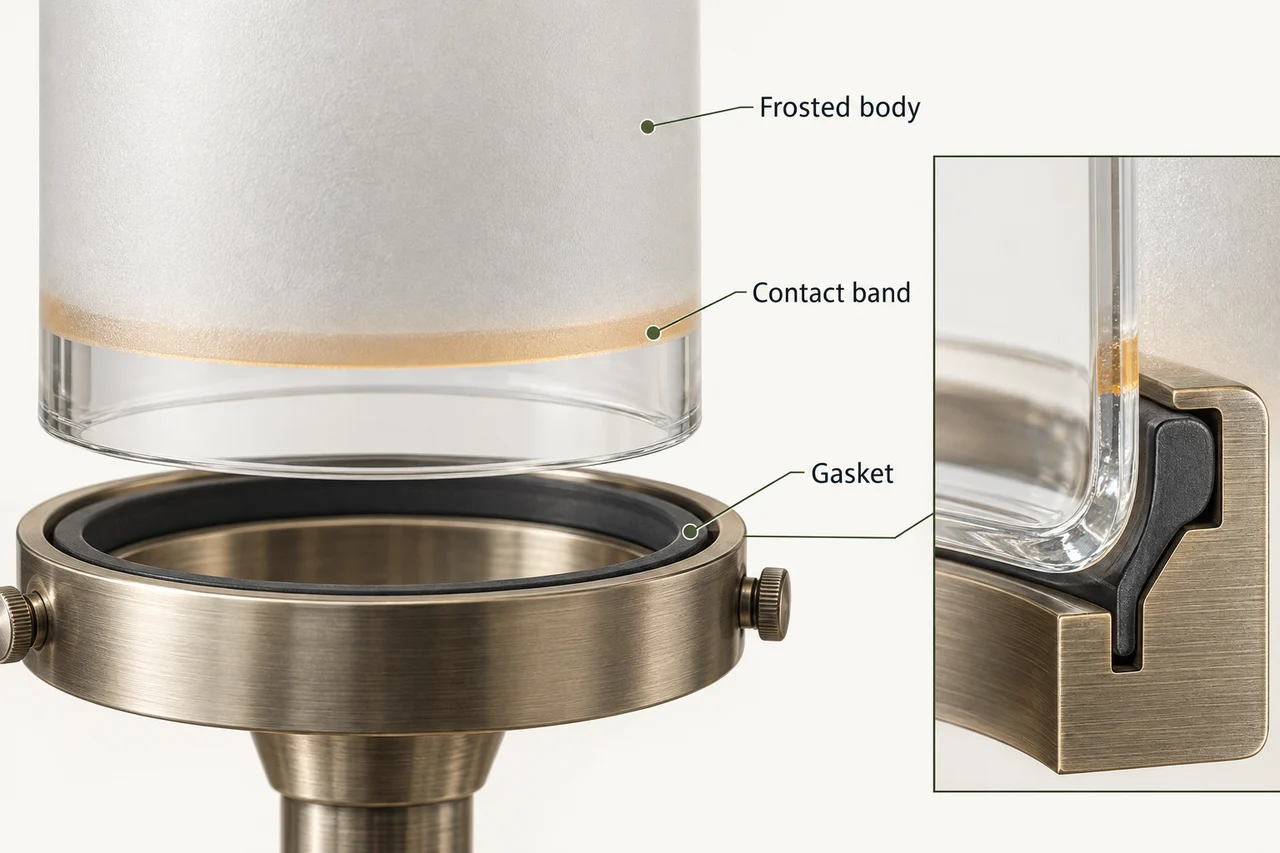
Put the finish boundary on the drawing. Identify the retaining-ring contact band, gasket seat, threaded or locating features, and any adhesive area. Decide which surfaces receive treatment and which remain masked; avoid leaving this to the operator’s visual judgment.
Etching and blasting remove material from treated areas. A coating adds material. The dimensional effect depends on the actual process, so measure the finished component at its functional features. Do not assign a universal allowance from a photograph of the frost.
Check fit with the intended holder and gasket after finishing. Record seating, retention and contact marks using the assembly’s approved procedure. Tightening hardware harder to hide looseness can introduce a different failure mechanism.
Inspect the mask transition while the fixture is lit. A clean-looking boundary on an unlit shade may become a bright ring. If a clear contact zone is necessary, assess its visible position in the assembled fixture before moving the finish onto that zone.
Make cleaning part of the diffusion approval
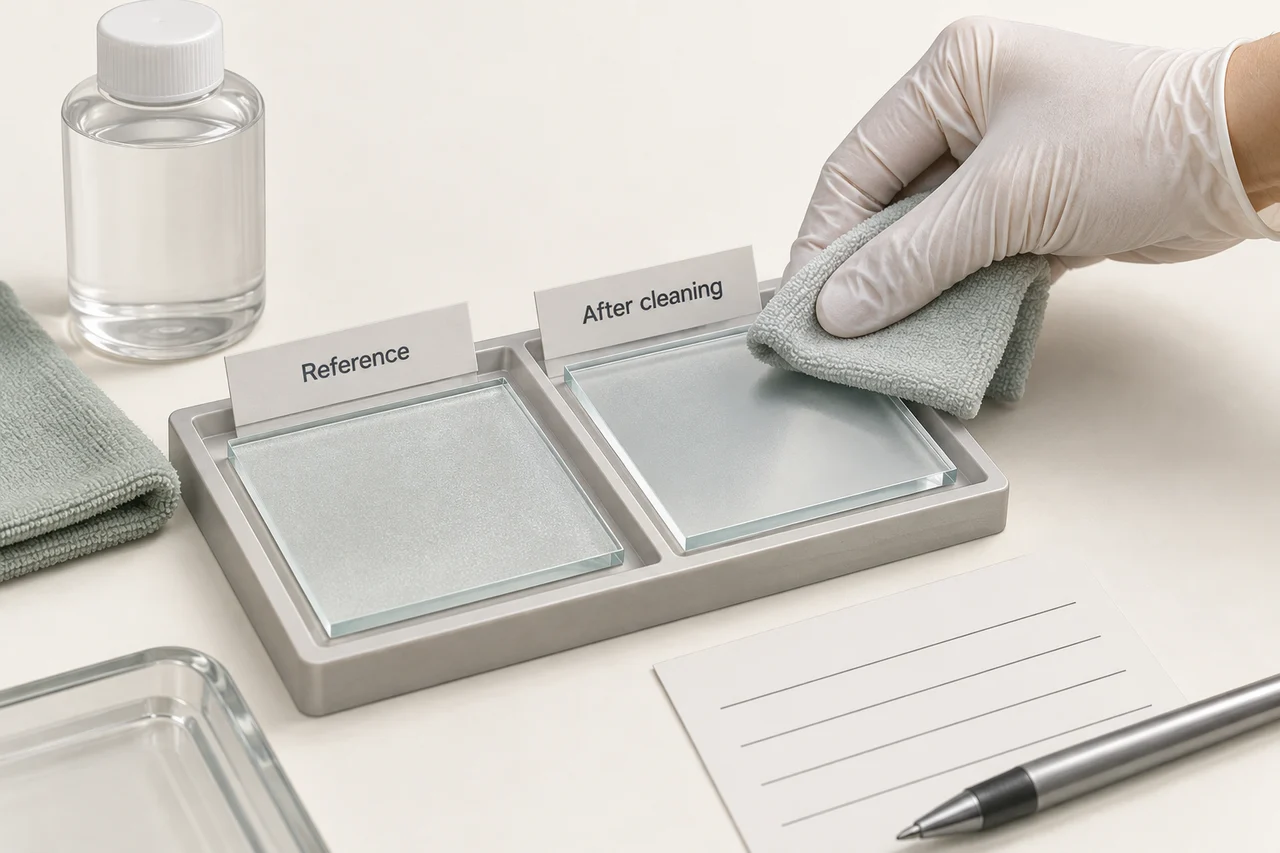
Hotel housekeeping introduces a practical material question: which cleaner and cloth will contact the shade, and how often? Agree a representative cleaning procedure with the buyer and finish supplier, then compare the sample before and after that procedure under the same lighting.
Rust-Oleum’s Specialty Frosted Glass instructions limit that product to interior surfaces, exclude repeated water contact and distinguish gentle cleaning from solvents that remove the finish. These limits show why a coating cannot inherit the cleaning assumptions used for bare glass.
For each proposed finish, check visible staining, streaks, local gloss change and coating loss. Use a retained untreated reference for the cleaning trial and keep photographs under fixed settings. Test the actual proposed cleaner instead of assuming that every product sold as glass cleaner has the same effect.
If the supplier adds a protective sealer to blasted or etched glass, repeat the optical comparison with that sealer included. Accept the final surface system, including its maintenance instructions.
Specify batch consistency and yield without inventing limits
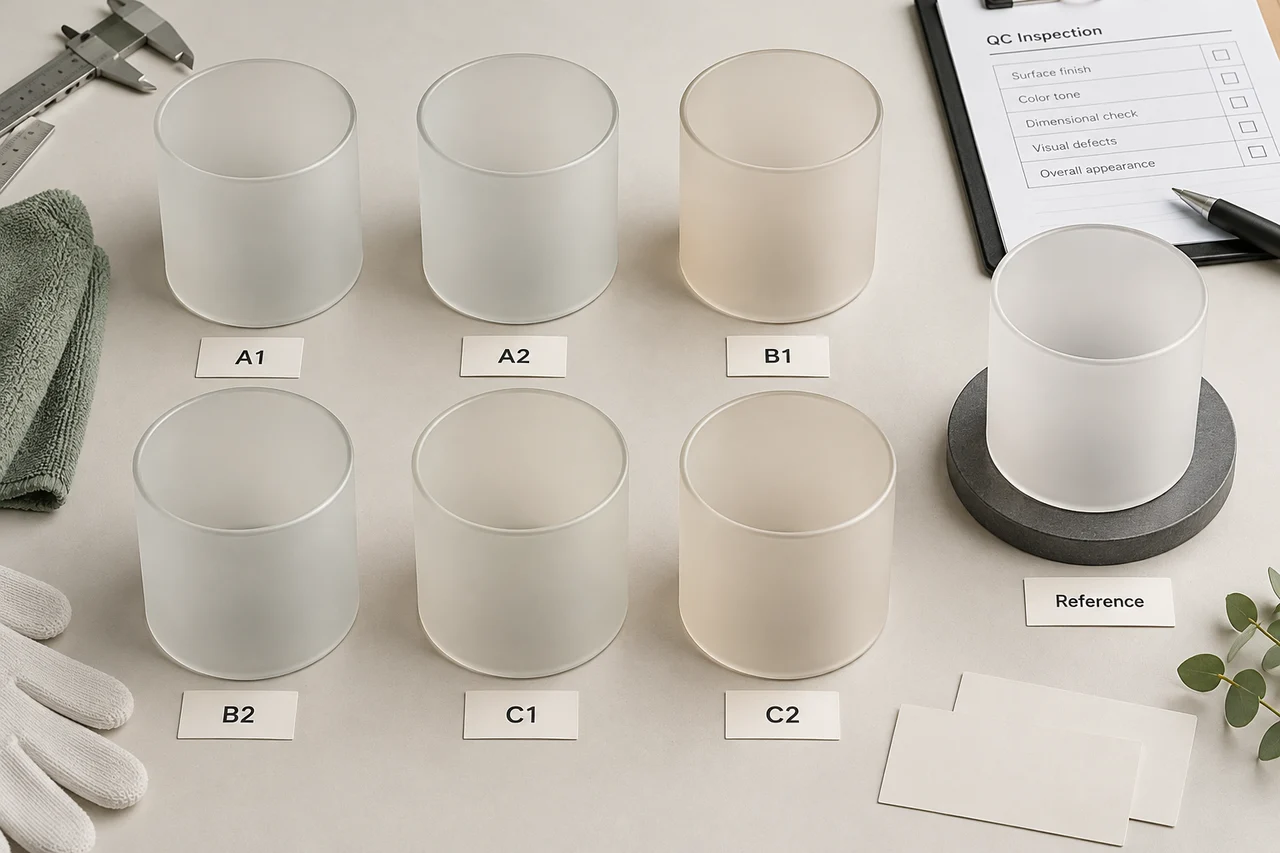
A signed sample defines an appearance target, but the purchase specification must explain how the production lot will be judged. Establish the sampling plan, inspection conditions, defect categories and escalation rules with the supplier before the order.
- Identify the master sample and any agreed boundary samples for acceptable finish variation.
- Record the finishing process revision, coating or media identification, treated face, and relevant production lot.
- Check optical variation at repeatable locations, including the neck, shoulder and mask transition where applicable.
- Record dimensional acceptance and finish acceptance separately, then check the assembled fixture.
- Keep initial rejects and reworked pieces visible in the yield record.
For a hypothetical batch of 200 inspected shades, 184 accepted without rework gives a first-pass acceptance rate of 92%. If 10 more pass after rework, the final accepted quantity is 194, or 97%. Reporting only the final figure conceals the rework burden. These numbers illustrate the calculation; they are not JX factory results or suggested acceptance thresholds.
Review repeat orders against the retained reference. A raw-material, sealer, media, coating or cure change should trigger a documented assessment of which checks must be repeated.
Trace an uneven result before changing the whole process
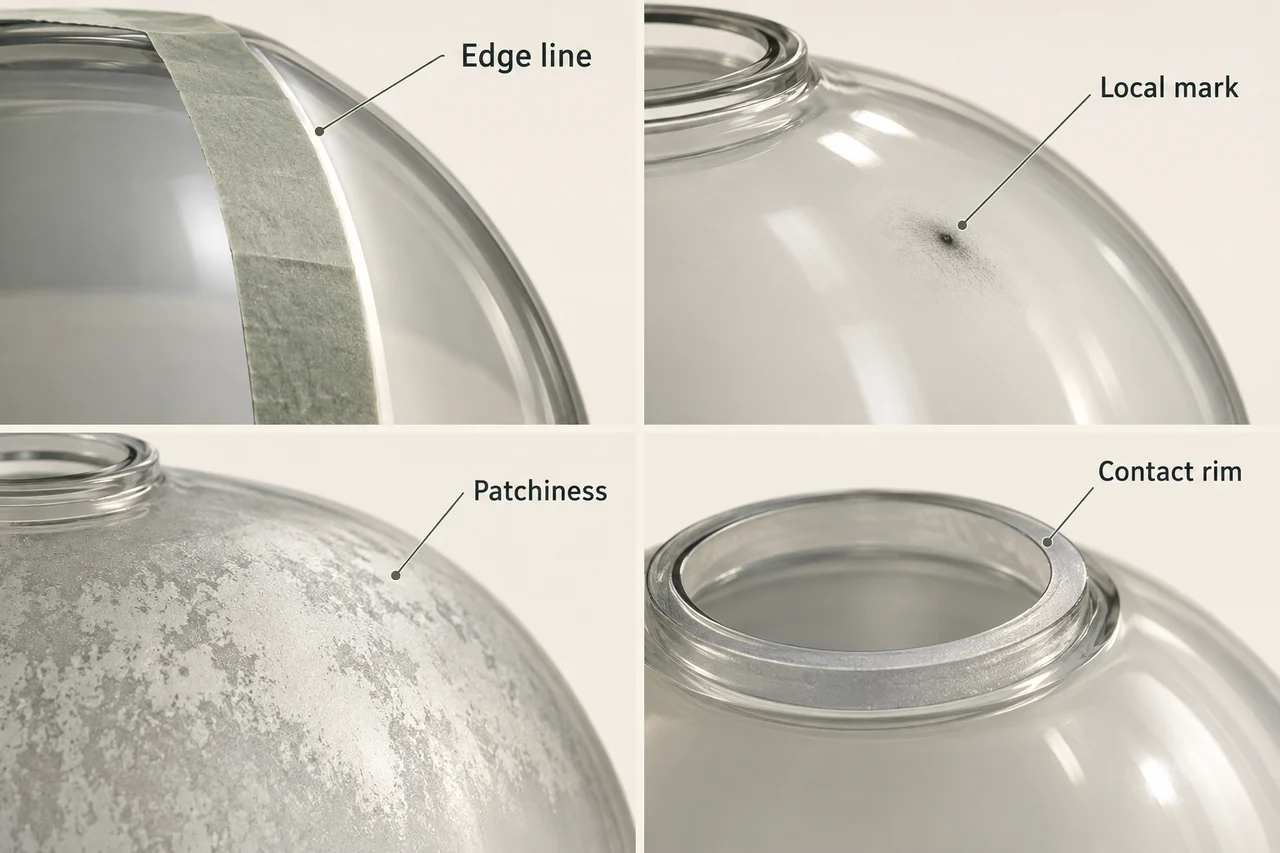
Use the location and repeatability of a defect to narrow the investigation. The following are diagnostic starting points; confirm the cause with a controlled check.
- A bright spot that stays with the lamp when the shade rotates suggests checking source geometry first.
- A patch that rotates with the shade suggests checking local finish, wall profile, contamination or coating coverage.
- A narrow bright ring at the mount suggests checking the mask boundary and assembled sight line.
- A mark that appears only after handling suggests checking gloves, packaging contact and the cleaning method.
- A coating defect appearing after the thermal test calls for review of the coating specification and process records before rework.
Change one candidate cause at a time. Keep a comparison sample rather than refinishing every failed part immediately; otherwise the evidence needed to explain the variation disappears.
Rework also needs qualification. A second coating pass, additional blasting or a local touch-up can change appearance and fit. Record the route and check the same acceptance features again.
Choose the finish for the installed home or hotel fixture
For a residential pendant, the design may prioritize texture and a recognizable illuminated shape. Start with etched and blasted samples that meet that visual target, then compare their useful output in the chosen fixture. Include frost spray only where the coating’s service and maintenance limits fit the application.
For a hotel bedside pair, prioritize a matched lit appearance from the guest’s viewing positions and a cleaning procedure that the property can follow. Evaluate replacement samples beside the reference so future purchases have an agreed comparison basis.
Before release, check four requirements: acceptable light distribution, acceptable surface durability, correct assembly fit, and a repeatable production specification. An attractive lit sample is still a design sample until the other requirements are resolved. Once all four are satisfied, record the approved finish in the purchasing specification and complete the fixture’s required compliance work.
Resolve the remaining limitation before comparing prices. If two finishes satisfy the same approved requirements, compare quotations on the same batch size, inspection plan, packaging and rework responsibility. There is no reliable universal cost ranking based only on the process name.

Questions manufacturers ask before sample approval
Is frosted glass always acid-etched?
No. Frosted describes an appearance. The glass may be acid-etched, abrasively treated or coated. Ask the supplier to identify the process, the treated face and any sealer.
Does acid-etched glass always diffuse light better than sandblasted glass?
No universal ranking is justified. Compare the actual finish grades on matching geometry using the same source and observation conditions. Record transmission separately from source hiding and surface uniformity.
Can I use frosted glass spray on a lamp shade?
Only after the exact product and application have been reviewed. Confirm coating temperature exposure, adhesion, cleaning and fixture requirements. Decorative suitability on a window does not establish suitability inside a lamp.
Is a flat haze sample enough to approve a curved shade?
It can help monitor the finishing process, but it does not reproduce the complete fixture geometry. Agree the optical method with the laboratory and inspect the finished shade with the intended source.
Should the inside or outside of the shade be frosted?
Choose the treated face through optical and service review. Consider visible texture, cleaning access, coating exposure and contact with fittings. State the chosen face on the drawing and sample record.
What happens if a supplier changes the protective sealer?
Treat it as a material or process change. Review optical appearance, cleaning compatibility and any relevant thermal or adhesion checks before accepting the replacement system.
What should an RFQ include for these three finishes?
Send the shade drawing, intended lamp or LED details, finish references, treated face and masking zones, cleaning conditions, quantity, required tests and acceptance method. Ask for a quotation against the same sample and inspection scope.
Turn the comparison into a shade sample specification
Send JX Lampshade a drawing and a description of the assembled lighting condition, together with the three finish candidates you want assessed. JX’s custom glass shade services include work from drawings or samples, finish customization and sample confirmation. Availability of a specific coating or finishing route must be confirmed for the project.
Include the glass shape and wall requirements, fitter drawing, LED or lamp position, visible areas, finish face and masking boundaries. For a hotel project, add the proposed cleaning products and the requirement for matched replacement shades. Attach the agreed optical comparison method if your laboratory already has one.
Ask for samples and a quotation against that defined scope. Confirm MOQ, tooling, lead time, coating documentation, inspection responsibility and packaging in the quotation. Retain the approved samples and drawing revision together so the production team can repeat the decision when the next order arrives.