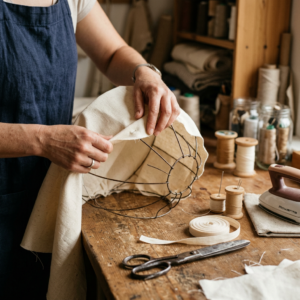
A DIY lampshade is one you make or recover yourself, using a wire frame or an old shade plus fabric or paper and adhesive or stitching. The easiest method is a no-sew self-adhesive styrene panel rolled onto frame rings.
You have a bare bulb that needs covering, or a thrift-store lamp with a stained, dated shade that’s otherwise fine. Buying a replacement is one option. Making your own is cheaper, lets you match any fabric, and is genuinely achievable in an afternoon once you know the method. The trouble is that searching for help turns up a Pinterest board of finished photos and a couple of videos, but no clear written steps. This guide gives you those steps: what you need, how to make a no-sew DIY lampshade, how to do a sewn or pleated one, how to work with recycled materials, and how to fix the mistakes that trip up first-timers.

What is a DIY lampshade?
A DIY lampshade is a lampshade you build or re-cover yourself rather than buy finished. There are two distinct projects under that name, and choosing the right one for your situation saves a lot of frustration.
Making new vs recovering an existing shade
Making a new DIY lampshade starts from a bare wire frame (or a frame plus a styrene backing panel) and adds your own covering. You control the shape, size, and material completely. This is the route when you have a lamp with no shade, want a non-standard size, or want a specific fabric.
Recovering an existing shade strips or covers over the fabric on a shade you already have, reusing its frame and structure. This is faster and easier because the frame and proportions are already set. It’s the right route for a thrift-flip: an outdated or stained shade with a sound frame is the perfect candidate for a recover.
Most first-time DIY lampshade projects should be recovers. The frame is the hardest part to get right, and a donor shade gives you one for free, already round and true.
A skill, time, and cost reality check
Let’s be honest about what this takes. A no-sew recover of a simple drum shade takes about one to two hours and costs the price of fabric (often under $15). Building a new pleated shade from a bare frame is a half-day project and demands patience with measuring. Neither requires special skills, but both reward careful prep.
| Project | Difficulty | Time | Rough cost | Best for |
|---|---|---|---|---|
| No-sew recover (drum) | Easy | 1–2 hrs | $5–15 (fabric) | First-timers, thrift flips |
| New no-sew drum from frame | Easy–medium | 2–3 hrs | $15–30 | Custom size/fabric, no donor shade |
| Sewn soft drum | Medium | 3–4 hrs | $15–35 | A softer, lined finish |
| Pleated shade from frame | Medium–hard | Half day | $20–40 | Traditional look, patience required |
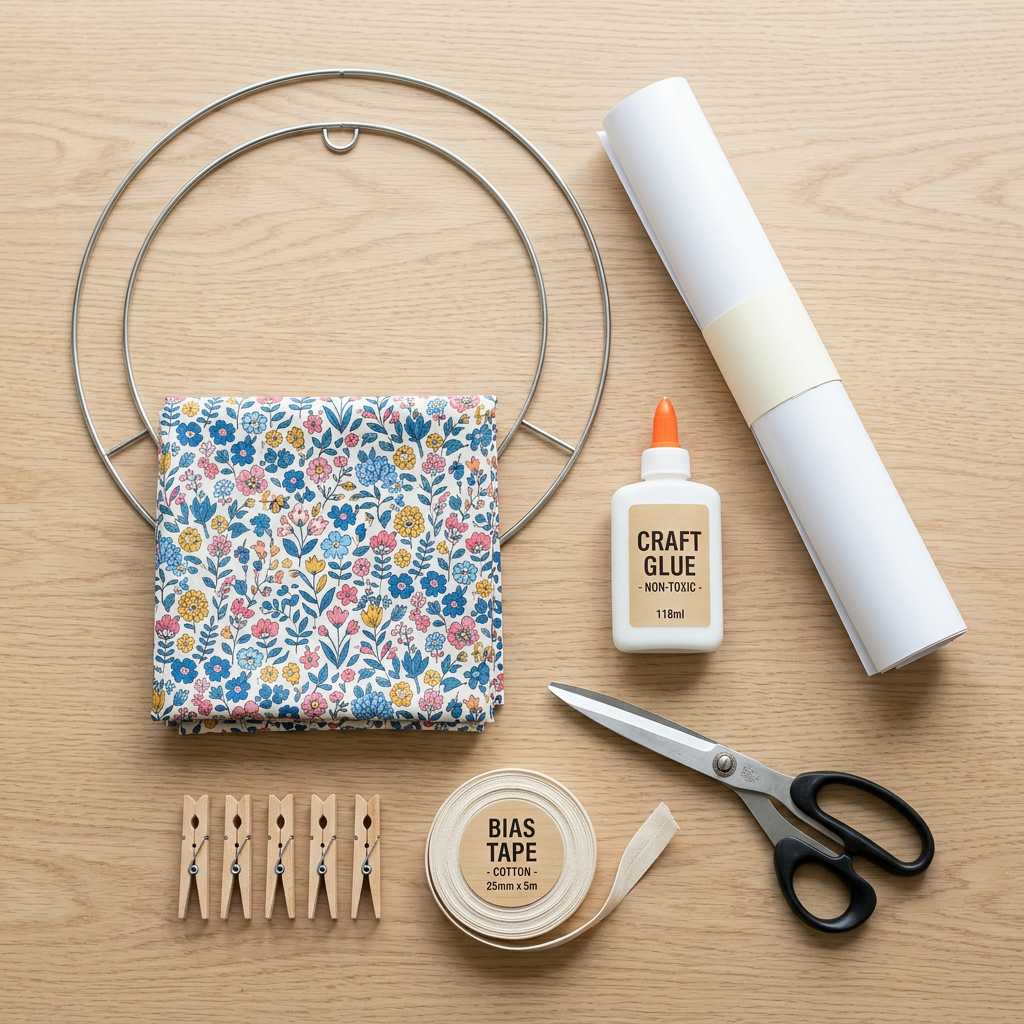
Tools and materials you need
A DIY lampshade needs a frame or donor shade, a covering material, and a bonding method (adhesive or thread). Gather everything before you start; stopping mid-project to source a missing item is how shades end up half-finished in a closet.
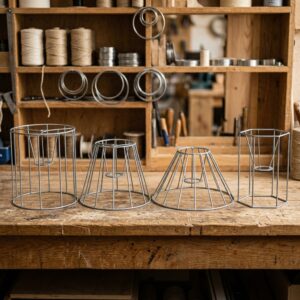
The frame (or donor shade)
The frame is the foundation. You have three options:
- A donor shade: an existing shade you’ll recover. Free frame, correct proportions. Check that the wire isn’t bent and the rings are round.
- A bare wire frame: bought new in the shape and size you want. For how to choose frame shape, wire gauge, and fitter type, see our guide to lampshade frames — getting the frame right is most of the battle.
- A DIY lampshade kit: frame rings plus a pre-cut self-adhesive styrene panel, sold together. The easiest entry point for a new shade because the styrene is already sized.
A bent or out-of-round frame will telegraph every flaw into the finished shade, so this is not the place to improvise with coat-hanger wire.
Covering material by weight
The covering material makes or breaks the look. Weight matters more than you’d think:
- Medium-weight cotton or linen: the most forgiving choice. Holds shape, bonds well, diffuses light warmly. Best for a first project.
- Quilting cotton: widely available in prints, light enough to handle easily, opaque enough to hide the bulb. A safe default.
- Lightweight silk or silk-blend fabric: beautiful glow but slippery and prone to wrinkling against the styrene. Save it for your second or third shade.
- Paper, wallpaper, or maps: work on a styrene backing for a stiff, modern look. No stretch, so they crease rather than smooth out.
Avoid stretch fabrics (jersey, anything with spandex) entirely. They distort under tension and never sit flat on a DIY lampshade.
Adhesive, styrene, and finishing supplies
The rest of the kit:
- Self-adhesive styrene panel (PSA styrene): the no-sew core. One side is sticky; you press fabric onto it, then roll the panel onto the frame rings.
- PVA fabric glue or craft adhesive: for bonding edges and binding. Not hot glue — hot glue leaves hard ridges and bonds poorly to bias tape.
- Double-sided tape (strong, fabric-rated): for the seam and the top/bottom ring wrap.
- Bias tape or grosgrain ribbon: to finish the top and bottom edges cleanly.
- Tools: sharp fabric scissors or a rotary cutter, a metal ruler, a pencil, clothespins or bulldog clips, and an iron.
| Material | Role | Why this, not the alternative |
|---|---|---|
| Self-adhesive styrene | No-sew backing | Skips sewing entirely; gives a crisp, rigid shade |
| PVA fabric glue | Edge bonding | Dries clear and flexible; hot glue ridges and yellows |
| Double-sided fabric tape | Seam + ring wrap | Cleaner seam than wet glue, no drying wait |
| Bias tape / ribbon | Edge finishing | Hides raw fabric and ring wire at top and bottom |
| Iron | Pressing fabric & folds | Unpressed fabric wrinkles permanently under tension |
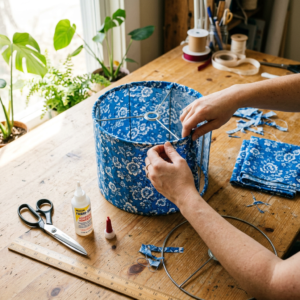
How to make a no-sew DIY lampshade (step by step)
The no-sew method uses a self-adhesive styrene panel and needs no stitching at all. This is the answer to “how do I make a lampshade without sewing” and the best starting point for any beginner.
Step 1: Prep the styrene panel and fabric
- Press the fabric flat with an iron. Any wrinkle now becomes permanent once bonded.
- Lay the styrene panel sticky-side up on a clean, flat surface. If using a kit, it’s pre-cut; if cutting your own, leave about 1″ of overhang on the top, bottom, and one side for trimming later.
- Position the fabric face-up over the styrene before peeling, checking that any pattern runs straight. With the alignment confirmed, peel back a few inches of the protective backing at one edge.
Step 2: Bond the fabric to the styrene
- Press the fabric onto the exposed adhesive at the starting edge, smoothing outward from the center to push out air bubbles.
- Peel the backing progressively, smoothing the fabric down a few inches at a time. Work slowly. A bubble caught here shows as a lump on the finished DIY lampshade.
- Trim the fabric flush with the top and bottom of the styrene, leaving about ½” overhang on each long edge and one short edge for wrapping.
Step 3: Roll onto the rings and bind the edges
- Run a line of double-sided tape around the outer edge of both the top and bottom rings.
- Place the rings at the top and bottom edges of the styrene panel and begin rolling the panel around them, pressing the styrene onto the taped rings as you go. The fabric faces outward.
- Overlap the seam by about ½”, apply PVA glue or double-sided tape to the underlap, and press the seam closed. Hold with clothespins until set.
- Fold the top and bottom fabric overhang to the inside, gluing it down over the ring wire so no raw edge shows.
- Finish the rims with bias tape or ribbon glued over the inside edge for a clean professional look.
Expert tip: a wooden dowel or a rolling pin helps press the seam evenly. Apply firm, even pressure along the whole seam rather than pinching just the middle, or the seam will gap at the rims.
That’s a complete no-sew DIY lampshade. The same method works whether you’re building new on bare rings or recovering by rolling a fresh panel over a stripped donor frame.
How to make a sewn or pleated DIY lampshade
A sewn DIY lampshade replaces the styrene backing with fabric stitched directly to the frame, giving a softer, more luminous result. It takes more skill but produces a higher-end finish.
Soft-sewn drum shade
A soft-sewn drum skips the styrene entirely. You cut a fabric rectangle the height of the frame plus a seam allowance, and long enough to wrap the circumference plus overlap. The fabric is wrapped around the top and bottom rings and whipstitched to them with a curved needle and strong thread, then the vertical seam is hand-stitched or glued closed.
Soft-sewn shades diffuse light more softly than hard-back styrene shades because there’s no plastic layer between fabric and bulb. The trade-off is that the fabric must be held under even tension while stitching, which takes practice. A lining adds another layer and another round of stitching.
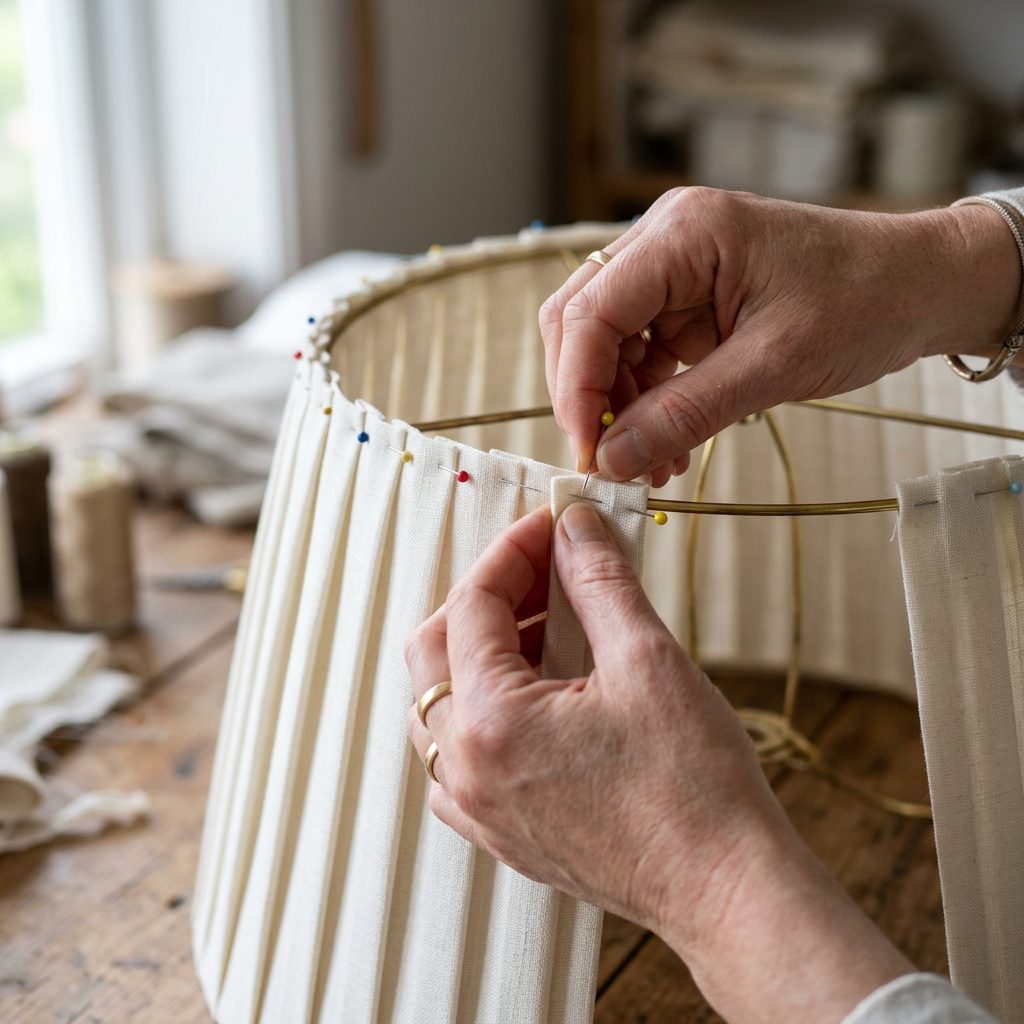
Basic knife pleat
A pleated DIY lampshade is the most advanced common project. The principle: fabric is folded into regular vertical pleats and stitched or pinned to the frame rings, with each fold pressed crisp.
The make-or-break step is the math. Measure the circumference of the bottom ring, decide your pleat width (1″–1.5″ is typical), and confirm the count divides evenly so you don’t end up with one odd-width pleat at the seam. Pin every pleat to the ring before committing, press each fold with an iron, then stitch the top and bottom. Our pleated lampshade guide walks through knife, box, and cartridge pleats in detail if you want to go this route.
Pleating is rewarding but unforgiving. We’d suggest a no-sew or soft-sewn shade first, then attempt pleats once you’re comfortable with the frame.
DIY lampshade with recycled materials
A DIY lampshade is a natural project for recycled and repurposed materials, which cut cost to nearly zero and give a one-of-a-kind result. The method is the same as above; only the covering changes.
What works: fabric scraps, paper, and more
Materials that recover or cover well on a styrene backing:
- Fabric scraps and old clothing: a favorite shirt, vintage scarf, or curtain offcut. Lightweight cotton scraps behave best.
- Wallpaper offcuts and gift wrap: stiff, patterned, and already flat — ideal for a hard-back DIY lampshade.
- Maps and book pages: a popular decorative look, sealed with a thin coat of PVA or mod-podge to prevent yellowing and add durability.
- Pressed fabric from a thrifted shade: recovering a thrift-store shade is recycling in itself, reusing the entire frame.
What doesn’t work (and the safety line)
Some recycled materials are genuinely risky on a lamp:
- Anything flammable and thin near a hot bulb: thin dried materials, loose paper edges, or fabric touching an incandescent bulb is a fire risk.
- Plastic, cellophane, or synthetic films: can melt or release fumes when warm.
The heat question is far less of a problem with LED bulbs. The U.S. Department of Energy notes that LEDs release about 90% of their energy savings versus incandescent partly because they run far cooler, which dramatically lowers the heat stress on any DIY lampshade material. If you’re making shades from paper or delicate recycled fabric, an LED bulb is the single best safety upgrade. Keep any covering a sensible distance from the bulb regardless.
Common DIY lampshade mistakes (and how to fix them)
Most DIY lampshade problems come from a handful of repeatable errors. Knowing them in advance is how you avoid redoing the whole shade.
Bubbles, wrinkles, and an uneven seam
Bubbles under the fabric: caused by peeling the styrene backing too fast or not smoothing outward. Fix by lifting the fabric gently while the adhesive is fresh and re-smoothing from the center. Once fully bonded, a bubble is usually permanent.
Wrinkles: almost always from skipping the iron, or from using a stretch fabric. There’s no fix after bonding; prevention is pressing the fabric first and choosing a non-stretch material.
An uneven or gapping seam: from rolling the panel unevenly or applying pressure only at the seam’s middle. Press the entire seam length firmly with a dowel, and hold it closed with clips along the whole edge until set.
Wrong fitter or bad proportion
The shade doesn’t fit the lamp: the fitter type or size is wrong. A spider-fitter shade needs a harp; a uno or clip-on attaches differently. Confirm your lamp’s mounting before building. For sizing the shade to the base, our measuring guide covers the three measurements that govern fit, and the method applies to any shade.
The proportions look off: usually a shade too small for the base. The shade’s bottom diameter should be at least 2″ wider than the widest point of the base, and the height roughly one-third of the total lamp height. Build to those proportions, not to whatever frame you happened to have.
If you’d rather skip the build entirely for a particular lamp — say an antique that wants a period-correct glass shade — a ready-made cut glass lamp shade in the right fitter size is sometimes the better answer than a DIY fabric shade. DIY is great for fabric drums; it’s not the route for replacing a glass globe.
FAQ
How do you make a homemade lampshade without sewing?
Use a self-adhesive styrene panel. Press your fabric, peel the styrene’s backing while smoothing the fabric onto the adhesive, trim the edges, then roll the panel onto the top and bottom frame rings with double-sided tape. Overlap and glue the seam, fold the overhang inside, and finish the rims with bias tape. No needle or thread is needed at any point — it’s the fastest and most beginner-friendly DIY lampshade method.
What is the cheapest way to make a DIY lampshade?
Recover an existing shade with fabric you already own. Reusing a donor shade’s frame eliminates the most expensive component, and fabric scraps, old clothing, or wallpaper offcuts cost nothing. A no-sew recover using leftover fabric and double-sided tape can cost essentially zero. Buying a bare frame and new fabric runs $15–30; a recover with scraps is the budget winner.
Where can I buy lampshade frames for a DIY project?
Craft supply retailers, lampshade specialty suppliers, and online marketplaces sell bare wire frames in standard shapes and sizes. DIY lampshade kits that bundle frame rings with a pre-cut self-adhesive styrene panel are the easiest option for beginners. You can also reuse the frame from any old shade. Choose a frame with round, untwisted rings and the correct fitter type for your lamp before buying covering material.
Can I recover an old lampshade instead of making one from scratch?
Yes, and it’s usually easier. Recovering reuses the existing frame, which is already round and correctly proportioned — the hardest part to get right when building new. Strip or cover the old fabric, then apply your new covering with the same no-sew or sewn method. Recovering a thrifted or dated shade with sound structure is the ideal first DIY lampshade project.
What kind of glue should I use on a DIY lampshade?
Use PVA fabric glue or a fabric-rated craft adhesive for edges and binding, plus strong double-sided fabric tape for the seam and ring wraps. Avoid hot glue: it leaves hard visible ridges, bonds poorly to bias tape, and can yellow over time. PVA dries clear and stays flexible, which keeps the finished DIY lampshade looking clean at the seams and rims.
Is it safe to put a homemade lampshade on a lamp?
Yes, with sensible precautions. Keep the covering material a reasonable distance from the bulb, avoid thin flammable or plastic materials touching the bulb, and use an LED bulb, which runs far cooler than incandescent and greatly reduces heat stress on fabric or paper. A properly built DIY lampshade on a frame with the correct fitter, used with an LED bulb, is as safe as a store-bought shade.

Conclusion
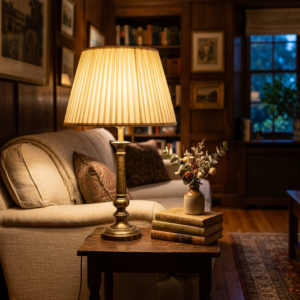
A DIY lampshade is one of the most satisfying small home projects: low cost, fast results, and total control over the fabric. The two routes are making new from a frame or recovering an existing shade, and the easiest method by far is the no-sew self-adhesive styrene panel rolled onto frame rings. Start there, get comfortable with the frame and the seam, and move up to soft-sewn or pleated shades once you’ve got one under your belt.
The pieces that matter most: a true, round frame (or a sound donor shade), a non-stretch covering pressed flat before bonding, PVA glue rather than hot glue, and an LED bulb for safety. Get those right and your first DIY lampshade will look bought, not homemade. And for the lamps where a fabric shade isn’t the answer — antiques and fixtures built for glass — our cut glass lamp shades collection covers period-correct glass options in standard fitter sizes.