To measure a replacement glass shade for outdoor lights, take three dimensions: fitter diameter (the inner clear span of the collar that rests on the fixture’s holder ring), maximum shade width, and shade height from fitter lip to the lowest edge. Fitter diameter is the only measurement that governs fit — get it wrong and the shade cannot seat regardless of how perfect everything else looks.
You tracked down a glass shade that looks exactly right — correct frosted finish, correct globe shape, correct price. It ships, arrives, and you hold it over the outdoor lantern. It sits 4 mm too wide on the holder ring, tilted at an angle, refusing to seat properly. Back in the box. Return label printed.
This happens more often than any glass shade supplier will admit. Not because replacement shades are hard to find — they aren’t — but because most buyers measure the wrong dimension first. They start with the visible diameter of the globe and skip the fitter opening. The fitter diameter is the one number that controls whether the shade physically fits. Everything else is secondary.
This guide covers exactly how to measure replacement glass shade for outdoor lights: which three measurements to take, where precisely to measure each one, how to identify your fixture’s fitter type, what to do when the original shade is missing entirely, and what outdoor-specific factors change the equation beyond basic dimensions.
What Is a Glass Shade Fitter and Why It Controls Fit
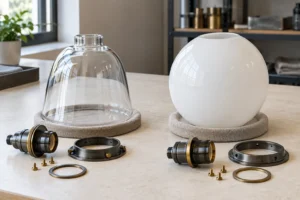
The fitter is the circular collar at the top of a glass shade — the opening that rests on the fixture’s holder ring when the shade is installed. When you seat a glass shade on an outdoor lantern, wall sconce, or post light, the fitter lip contacts the metal or rubber-gasketed ring of the fixture. Nothing else does.
Fitter diameter is the inner diameter of that collar, measured from inner glass edge to inner glass edge across the full opening. This number must match the fixture’s holder ring inner diameter within approximately 1 mm for the shade to sit flat and stable. A shade with a 4-inch fitter opening will not seat on a fixture holder ring designed for a 2¼-inch fitter, even if both shades appear similar in overall globe size.
Why the Globe Width Doesn’t Determine Fit
Most buyers start by measuring the widest visible point of the shade — the maximum globe or bell diameter. That dimension tells you how large the shade looks and whether it clears the fixture arms, but it has no bearing on whether the shade seats correctly. Two glass shades can share an identical 6-inch globe diameter and have completely different fitter openings — one at 2¼ inches, one at 4 inches — requiring entirely different fixtures.
Product listings frequently contribute to this confusion. A listing titled “6-inch frosted globe shade” uses the 6-inch number to describe the globe body diameter. The fitter size is usually buried in the specifications table or left out entirely. Buyers assume the prominent size number refers to fit. It doesn’t. This is the single most common cause of wrong-size returns when ordering replacement glass shades for outdoor lights.
The Fitter Lip Depth — the Detail Most Guides Skip
Beyond diameter, every fitter has a lip depth — the vertical height of the glass collar below the fitter rim. Standard fitter lip depths run from 3/8 to ½ inch (10–13 mm). A shade with a shallower lip than the original may not compress the holder ring gasket correctly in outdoor fixtures designed for a weatherproof seal at the shade junction.
For any outdoor fixture with a rubber or silicone gasket at the holder ring — common on IP44-rated or better outdoor lanterns and porch lights — the fitter lip depth is a functional waterproofing dimension, not just an aesthetic one.
| Fitter Diameter | Common Outdoor Fixture Types | Typical Lip Depth |
|---|---|---|
| 2¼ inch (57 mm) | Small outdoor wall sconces, table lamp crossovers | 3/8 inch (10 mm) |
| 4 inch (102 mm) | Outdoor post lanterns, flush-mount porch ceilings, wall sconces | 7/16 inch (11 mm) |
| 6 inch (152 mm) | Large pendant lanterns, outdoor ceiling fan shades | ½ inch (13 mm) |
| 2⅛ inch (54 mm) | Legacy Victorian-era outdoor fixtures | 3/8 inch (10 mm) |
The Three Measurements Every Replacement Needs
Measuring a replacement glass shade for outdoor lights correctly means recording three dimensions before you search for a product. All three are relevant; only one determines fit.
Measurement 1 — Fitter Diameter (The Fit-Critical Dimension)
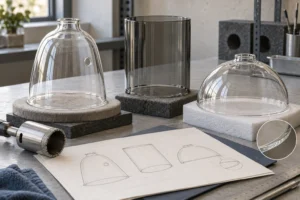
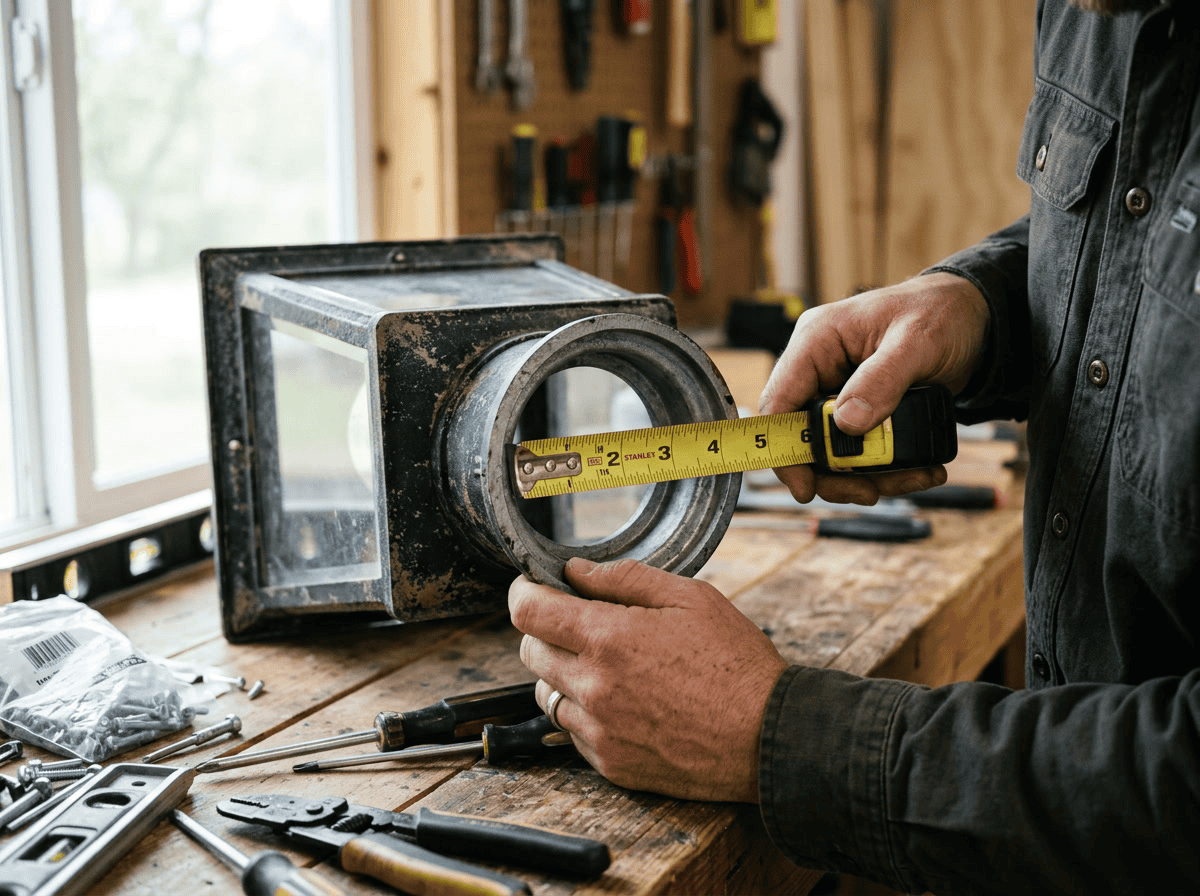
This is the measurement that determines whether the replacement glass shade for outdoor lights physically seats on your fixture. Measure the inside diameter of the glass collar — the unobstructed span from inner glass edge to inner glass edge across the opening.
Do not measure the outer edge of the collar. The outer diameter is always larger than the inner and will give you a fitter size that is too large.
Tool: A rigid steel rule or vernier calipers. A flexible tape measure bends into the curved collar and produces a chord reading shorter than the true diameter — sometimes by 3–5 mm, which is enough to send you to the wrong fitter size.
How to take this measurement:
1. Set the shade with the fitter opening facing upward on a stable surface.
2. Place the steel rule or caliper jaws across the opening, touching both inner glass edges at the widest span.
3. Read and record the diameter in inches and millimeters (metric helps when sourcing from international glass shade manufacturers).
4. Rotate 90° and measure again. If the two readings differ by more than 1 mm, the fitter opening is slightly oval — record both and use the larger value when ordering.
Tolerance: Most outdoor fixture holder rings accept fitter diameters within ±1 mm of the rated size. A shade 2 mm oversized sits on the ring shoulder without fully seating and rocks in wind. A shade 2 mm undersized drops past the ring shoulder into the fixture housing.
Measurement 2 — Maximum Shade Width (Globe Diameter)
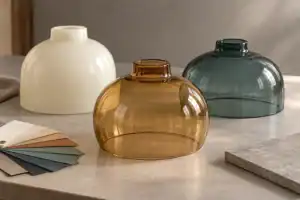
Maximum shade width is the widest horizontal dimension of the shade body — not the fitter collar, but the glass globe or bell below it. For a spherical globe shade, this is the equatorial diameter. For a bell or flared shade, the widest point is typically located about two-thirds of the way down from the fitter collar.
Why this measurement matters: Maximum width tells you whether the replacement glass shade clears the fixture arms, wall bracket, or adjacent hardware. On outdoor post lanterns with cage-style frames, the shade must pass through the frame opening during installation. On wall sconces, the shade must clear the mounting arm.
How to take this measurement:
1. Hold a rigid rule horizontally across the widest visible portion of the shade body.
2. Rotate the shade slowly while keeping the rule at that height.
3. The maximum reading you observe as the shade rotates is the true maximum width. Record it.
Measurement 3 — Shade Height
Height is measured from the base of the fitter lip — the point where the fitter collar meets the shade body — down to the lowest edge of the shade. This is not the total glass piece height including the collar itself. On a cylinder shade, height equals the visible glass body length. On a bell or flared shade, height runs from the collar base to the widest lower opening.
Why this measurement matters: Shade height controls visual proportion and — in enclosed outdoor fixtures — determines whether the shade clears the lamp socket and internal hardware. A shade 15 mm taller than the original in a fully enclosed outdoor lantern housing may contact the socket hood during installation, concentrating heat at the contact point or cracking the fitter rim as you press it into position.
How to take this measurement:
1. Place the shade fitter-side-down on a flat surface. The fitter lip base now contacts the surface.
2. Measure vertically from the surface (= fitter lip base) to the tallest point of the shade body.
| Measurement | Exactly Where to Measure | Best Tool | Fit Tolerance |
|---|---|---|---|
| Fitter diameter | Inner clear span of collar opening | Steel rule / vernier calipers | ±1 mm |
| Maximum shade width | Widest horizontal diameter of shade body | Steel rule / rigid tape | ±5 mm |
| Shade height | Fitter lip base to lowest edge of shade body | Steel rule / rigid tape | ±10 mm |
Fitter Types: Which Style Does Your Outdoor Fixture Use?
The fitter diameter tells you the size. The fitter type tells you the connection method — how the shade is actually held on the fixture. These are not interchangeable. A shade with the right diameter in the wrong fitter style will not install correctly.
Spider Fitter — Most Common on Outdoor Post Lanterns
The spider fitter is a metal frame with multiple arms (the “spider”) that sits inside the shade opening and connects to a ring centered on the lamp socket. The glass shade rests on the spider frame ring; a threaded finial passes through the spider center and screws into the socket below, clamping the shade in place.
Spider fitters are specified by the shade opening diameter they accept. A product listed as “spider fitter shade, 4-inch fitter” requires a fixture with a matching 4-inch spider ring. The glass shade itself has a 4-inch inner fitter diameter. Spider ring diameters are usually embossed on the replacement spider hardware.
Outdoor advantage of this style: the finial tightens against the spider, holding the shade firmly even in wind vibration or near road traffic. This is the most common fitter type on outdoor post lanterns, park lights, and heavy-duty wall sconces.
To measure for a spider fitter replacement: take the standard fitter inner diameter measurement. Then confirm the spider ring diameter on the fixture — it is almost always the same nominal size as the shade fitter (both 4 inches, both 6 inches, etc.).
Slip Uno Fitter — Common on Outdoor Wall Sconces
The slip uno (or just “uno”) fitter uses a shade ring that slides directly onto a threaded uno-style socket collar. No separate spider frame exists — the shade collar has a smooth inner surface that slips over the socket, and a threaded lock ring secures it from below.
Slip uno shades are standardized at approximately 1⅝-inch inner collar diameter for the socket fit. What varies between uno shades is the body dimension — globe width and shade height. When replacing a slip uno shade, confirm the product lists “slip uno” or “uno fitter” explicitly. Measuring the body dimensions (width, height) is the primary selection guide once uno compatibility is confirmed.
Keyless / 2¼-Inch Neck Fitter
Found on smaller outdoor fixtures and on designs that mount the shade directly over a standard medium Edison socket without a separate shade-holding ring. The glass shade neck opens at approximately 2¼ inches — small enough to slide over the socket nipple — and rests against the socket keyless, held by weight or a small set screw in the fixture housing.
Identifying a keyless fitter fixture: no separate metal shade ring is present. The fixture housing simply has a round opening, and the shade drops in from above. If you insert a finger into the fixture opening and feel no ring shoulder, you likely have a keyless fitter fixture.
How to Measure When the Original Glass Shade Is Missing
If the original glass shade is already gone — broken at the fixture, removed and lost, or absent when you moved in — you cannot measure the shade itself. You measure the fixture.
Measure the Fixture Holder Ring Directly
The holder ring is the metal ring at the fixture opening where the glass shade seats. Measure its inner diameter — the unobstructed span across the interior of the ring. This is your target fitter diameter.
Critical distinction: you want the inner diameter of the holder ring opening, not the outer diameter of the ring itself. A holder ring with a 4-inch inner opening has an outer ring diameter of 4½ inches or more. Measuring the outer diameter gives you a fitter size too large to seat properly inside the ring.
How to measure the holder ring inner diameter accurately:
1. Use vernier calipers if the geometry allows — slide the caliper jaws to span the inner ring edge cleanly.
2. If the ring geometry prevents calipers from reaching, place a rigid steel rule across the inner ring opening. Mark where the rule contacts both inner edges, then measure between the marks.
3. Compare your result to the standard outdoor fitter sizes: 2¼ inch (57 mm), 4 inch (102 mm), and 6 inch (152 mm). Your measured dimension will fall closest to one of these standards — that is your replacement fitter size.
4. A reading that falls more than 3 mm from any standard size often indicates a proprietary fitter from a specific fixture manufacturer. In that case, also check the fixture model number (see next section).
Decode the Fixture Model Number
Most branded outdoor fixtures have the model number printed on a sticker inside the housing, embossed on the mounting bracket, or printed on the original packaging. With the model number, you can:
- Search the manufacturer’s website directly for the original glass shade part number
- Contact the manufacturer’s customer service for replacement glass specifications
- Cross-reference with major outdoor lighting parts suppliers who maintain fixture-to-glass-shade compatibility databases
As IES lighting standards documentation notes, major fixture manufacturers are expected to maintain replacement parts availability for a minimum service life period. Many publish full glass shade specifications in their product service manuals — specifications that include fitter diameter, fitter lip depth, maximum shade width, and approved glass types.
Why Calipers Outperform Tape Measures for This Measurement
A flexible tape measure bends when you try to span a circular holder ring opening. Instead of measuring the true diameter, it measures a chord — a straight-line distance between two points on the ring’s inner circumference that falls short of the full diameter. Depending on how the tape bends, this error can reach 3–5 mm, which is enough to land you on the wrong fitter size.
According to ASTM dimensional measurement standards for glass products, accurate measurement of circular glass openings requires a rigid instrument with controlled contact points. A 6-inch vernier caliper achieves ±0.5 mm accuracy on holder ring inner diameters. Digital calipers are widely available at hardware stores for under $20 and eliminate reading ambiguity on curved surfaces.
Outdoor-Specific Considerations Beyond Dimensions
Two glass shades can have identical fitter diameters, globe widths, and heights — and one will survive a decade of outdoor service while the other fails in the first winter. When learning how to measure replacement glass shade for outdoor lights, the dimensional measurements get you the right size. The outdoor-specific checks get you the right glass.
Glass Wall Thickness and Thermal Shock Resistance
Outdoor glass shades experience temperature differentials that indoor shades never face. Rain hitting a shade warmed by a running fixture, frost forming on glass during a lit overnight in sub-freezing temperatures, or summer-to-winter ambient swings of 50–60°C — all generate thermal shock stress in the glass.
Wall thickness interacts with thermal shock resistance in a non-obvious way: thinner glass equalizes temperature faster across the glass cross-section, creating a smaller temperature gradient and lower resulting stress. Thicker glass has more mass and distributes stress over a larger volume. As technical documentation from Corning’s glass research confirms, the composition of the glass — specifically its thermal expansion coefficient — is a more reliable predictor of outdoor durability than wall thickness alone. Borosilicate glass (thermal expansion coefficient ≈ 3.3 ppm/°C) significantly outperforms standard soda-lime glass (8.5–9.5 ppm/°C) in outdoor temperature-cycling applications regardless of wall thickness.
When measuring the original shade at the fitter rim, also note the wall thickness if possible. A replacement with similar wall thickness maintains the thermal mass characteristics of the original. If you are upgrading to borosilicate, a thinner wall is acceptable — the lower expansion coefficient compensates.
Shade Shape and Wind Load for Exposed Fixtures
For outdoor fixtures exposed to direct wind — post lanterns, open-frame wall brackets, overhead pendants without enclosures — shade shape determines aerodynamic load and water ingress behavior. As NEMA outdoor luminaire standards address for fixture assembly design:
- Globe/ball shades present a uniform cross-section to wind in all directions. They are aerodynamically stable but have an open bottom that allows driven rain to reach the lamp socket.
- Bell and flared shades direct rain runoff away from the bulb socket but present a larger wind surface area that can act as a sail in sustained wind above 30 mph.
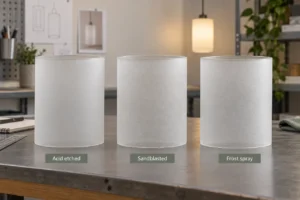
- Cylinder shades minimize wind cross-section and concentrate light downward, making them optimal for post-mount or overhead fixtures in high-wind locations.
Record the height-to-width ratio of the original shade (shade height ÷ maximum shade width). Matching this ratio in the replacement maintains the fixture’s original aerodynamic behavior and visual proportion. A ratio above 1.2 indicates a cylinder-dominant design. Below 0.8 indicates a flared or bell-dominant shape.
IP Rating and Gasket Clearance
Many outdoor fixtures carry an IP (Ingress Protection) rating — defined by IEC standard 60529 — that specifies how the complete fixture assembly resists water and dust penetration. The glass shade is part of this rated assembly; a replacement shade of different dimensions can disrupt the IP-rated seal at the fitter junction.
For fixtures rated IP44 (splash-proof) or higher, verify whether the original shade has a gasket groove on the fitter collar — a shallow recess approximately 3–4 mm below the fitter rim that accepts a rubber O-ring or molded gasket from the fixture. When measuring the fitter collar of the original shade, run your fingertip around the underside of the rim and feel for this groove. If present, your replacement must also include a matching groove at the same depth.
A replacement shade without a matching gasket groove on a gasketed outdoor fixture may appear to install correctly but will allow water infiltration at the fitter junction over time.
Common Measurement Mistakes and How to Avoid Them
Even buyers who know the theory make these specific errors when measuring replacement glass shades for outdoor lights. Each one results in a wrong-size order.
Measuring the Outer Edge of the Fitter Collar
The fitter collar outer diameter — the outside edge of the glass rim — is always larger than the inner opening you need. A shade with a 4-inch inner fitter opening typically has a fitter collar outer diameter of 4¾ to 5 inches. Measuring the outer edge and ordering a “4¾-inch fitter” guarantees a shade that drops through the holder ring.
Fix: Always measure the inner clear span. When reading a product specification, confirm whether the listed fitter diameter refers to the inner or outer dimension. If the listing doesn’t specify — ask the seller before purchasing, not after.
Treating Globe Diameter as Fitter Diameter
A listing for a “6-inch globe shade” describes the maximum body diameter. The fitter opening on that same 6-inch globe can be 2¼, 4, or even 6 inches — depending entirely on shade design. Assuming the prominent size number represents the fitter is the most common mistake buyers make when learning how to measure replacement glass shade for outdoor lights.
Fix: Record fitter diameter and globe diameter as two separate numbers. Never order replacement glass shades for outdoor lights based on globe size alone.
Ignoring Fitter Lip Depth on Gasketed Outdoor Fixtures
A replacement shade with a shallower fitter lip than the original may seat visually and appear correct. But if the fixture uses a rubber gasket at the holder ring, a shallower lip fails to compress the gasket fully — allowing water infiltration without any visible symptom at installation.
Fix: Measure the original shade’s fitter lip depth (from the underside of the fitter rim to the point where the collar meets the shade body). Match this dimension within 2 mm on the replacement. For outdoor fixtures, this detail is the difference between a weatherproof installation and one that leaks slowly through the shade junction.
Not Checking Clearance Inside Enclosed Fixtures
In enclosed outdoor fixtures — porch lanterns, flush-mount ceiling fixtures, enclosed wall sconces — the replacement shade must clear the lamp socket and socket hardware inside the housing. A shade 10–15 mm taller than the original may contact the socket hood during installation, cracking the fitter rim as you press down or creating a heat concentration point in operation.
Fix: With the fixture open and the original shade removed, measure from the holder ring seating surface down to the top of the lamp socket. Subtract 10 mm minimum clearance. The result is your maximum allowable shade height. As Energy.gov guidance on outdoor lighting retrofits notes, fixtures retrofitted with LED bulbs often have socket hardware positioned differently from the original incandescent configuration — always verify clearance against the current installed socket, not the original design spec.
Not Measuring Before Searching
Many buyers begin by browsing replacement glass shade product images, pick a shape they like, and then try to match their fixture to the product’s specifications in reverse. This approach almost always fails because product photos don’t convey actual scale, and “close enough” on fitter diameter is the same as wrong.
Fix: Complete all three measurements before opening any browser. Write the fitter diameter, maximum shade width, and shade height on a physical notepad. Search by fitter diameter first, filter by approximate globe diameter second, and use shade height last as a final confirmation. This sequence matches the way reputable glass shade suppliers structure their product databases.
FAQ
How to measure for a replacement lampshade?
Measure three dimensions: fitter diameter (inner clear span of the collar opening — this controls fit), maximum shade width (widest horizontal diameter of the shade body — controls clearance and proportion), and shade height (fitter lip base to lowest edge — controls internal clearance in enclosed fixtures). For outdoor replacements, also record fitter lip depth if your fixture has a rubber-gasketed holder ring.
How do you know what size light shade to buy?
Match the fitter diameter first — it must equal the fixture holder ring’s inner diameter. Standard outdoor fitter sizes are 2¼ inch, 4 inch, and 6 inch. Once fitter size is confirmed, use globe diameter to select the visual size, and shade height to confirm the replacement fits the fixture interior. If you don’t know your current shade’s fitter size, measure the fixture holder ring inner diameter directly with calipers and match it to the nearest standard size.
What is the “fitter” on a glass shade?
The fitter is the glass collar at the top of the shade — the circular opening that sits on the fixture’s holder ring when installed. Fitter diameter (measured across the inside of the opening) is the dimension that determines whether the shade physically fits the fixture. A mismatch of even 2 mm between shade fitter diameter and holder ring diameter causes the shade to rock or drop through the ring.
Can I measure the fixture holder ring instead of the original shade?
Yes — and for outdoor fixtures where the original shade is already broken or missing, this is the correct approach. Measure the inner diameter of the fixture holder ring using calipers. A flexible tape measure bends and gives a shorter chord reading — use a rigid tool. Compare your result to the standard fitter sizes (2¼”, 4″, 6″) and order the closest match.
Why is my replacement glass shade the right size but still wobbling on the fixture?
Wobble usually means the fitter diameter is 1–2 mm undersized — the shade drops slightly past the holder ring shoulder instead of seating flush on it. Try the next standard size up, or look for a shade with an adjustable tension ring at the fitter collar. On outdoor fixtures, a wobbly shade is also a water infiltration risk at the fitter junction, so this is worth correcting rather than ignoring.
Does shade height matter when replacing outdoor glass shades?
Yes — especially for enclosed outdoor fixtures where the shade must fit within a housing that also contains the lamp socket and socket hardware. Measure the internal clearance from the holder ring seat to the socket top before ordering. On open-frame outdoor fixtures (lanterns, caged sconces), height matters primarily for visual proportion rather than clearance. Match the original height within 10 mm for the best visual result.
How do I measure a replacement glass shade for outdoor ceiling fan lights?
Ceiling fan glass shades typically use a proprietary fitter style specific to the fan brand — often a slip-ring or bayonet style rather than a standard spider or uno. Measure the fitter inner diameter (use the same inner-opening technique as for any glass shade), then confirm whether the product lists compatibility with your fan brand specifically. Many outdoor ceiling fan manufacturers sell replacement glass shades as branded parts — searching the fan model number directly locates the correct shade faster than searching by generic dimensions alone.
Getting the Right Replacement Glass Shade the First Time
Knowing how to measure replacement glass shade for outdoor lights reduces to one foundational discipline: measure the fitter diameter first, with a rigid tool, from the inner glass edge. That single number controls whether the shade fits the fixture. Every other dimension — globe width, shade height, fitter lip depth — refines the selection once fitter fit is confirmed.
For outdoor applications specifically, take the additional step of noting the original shade’s fitter lip depth, glass wall thickness, and whether a gasket groove is present. These three details rarely appear in product listings but determine whether the replacement seals properly and survives outdoor temperature cycling. A shade that fits but doesn’t seal is a liability; a shade that seals but can’t handle thermal shock is a replacement waiting to happen.
If the original shade is already gone, measure the fixture holder ring inner diameter with vernier calipers, compare to the three standard fitter sizes, and proceed from there. A one-time measurement — taken carefully with the right tool — eliminates the return cycle entirely and gets the fixture looking correct again on the first order.