オイルランプを安全に使う方法:芯と煙突のガイド

目次

To use an oil lamp, start with a cold, undamaged lamp and the fuel approved by its maker. Fill it without overfilling, let a new or dry wick absorb fuel, trim the wick level, and light only the small exposed edge. Fit the correct glass chimney, then lower the wick until the flame burns steadily without smoke. Keep the lamp attended, away from children, pets and combustible materials, and let it cool before moving or refilling it.

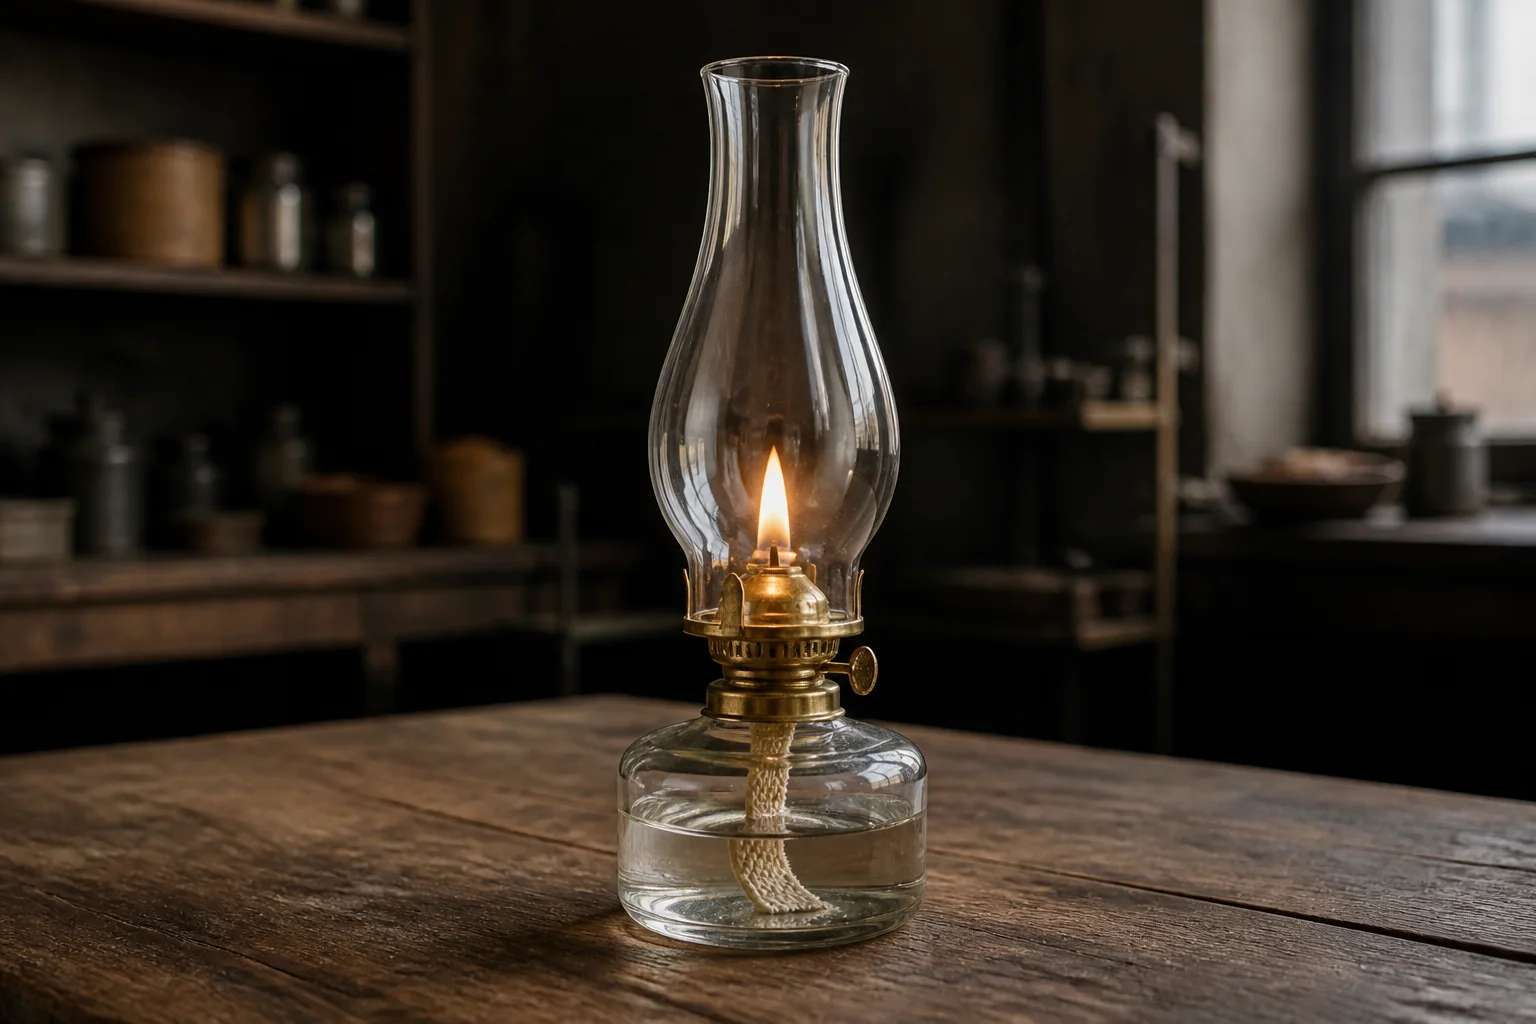
A traditional flat-wick oil lamp burning with a low steady flame inside a clear glass chimney on a stable wooden table

That is the short version. The details matter because oil lamps differ. A small flat-wick table lamp, a round-wick center-draft lamp and a pressure lantern do not share one lighting procedure. This guide covers traditional non-pressurized wick lamps. If the maker’s instructions differ, use those instructions.

Before lighting, identify the lamp and inspect every part

Do not start by pouring in whatever fuel happens to be available. First identify the burner and look for a maker’s mark, model number or instruction label. A pressure lantern, alcohol lamp, fragrance lamp and decorative liquid candle are not substitutes for a traditional wick lamp.

A basic flat-wick oil lamp has a fuel font or reservoir, a burner, a wick and a glass chimney. Some lamps add a shade ring or outer shade. The Milwaukee Public Museum’s explanation of lamp construction describes the same essential needs: fuel, a reservoir, a wick and a supply of air.

部位What it doesWhat to check before use
Fuel font or reservoirHolds liquid fuel below the burnerNo crack, leak, loose seam or residue from an unknown fuel
バーナーSupports the wick and meters air around the flameSecure fit, open air holes and a working wick-control knob
Draws fuel to the flameCorrect width, clean weave and free movement through the burner
Glass chimneyDirects airflow and shields the flameCorrect base fit, no crack or sharp chip, and no binding in the gallery
Shade and shade ringRedirect light and supports an outer shade where fittedStable support, proper clearance and no contact with the hot chimney

If the reservoir leaks, the burner will not hold the wick, or the chimney is cracked, stop. A decorative restoration is not ready to burn merely because its parts can be assembled.

How an oil lamp works

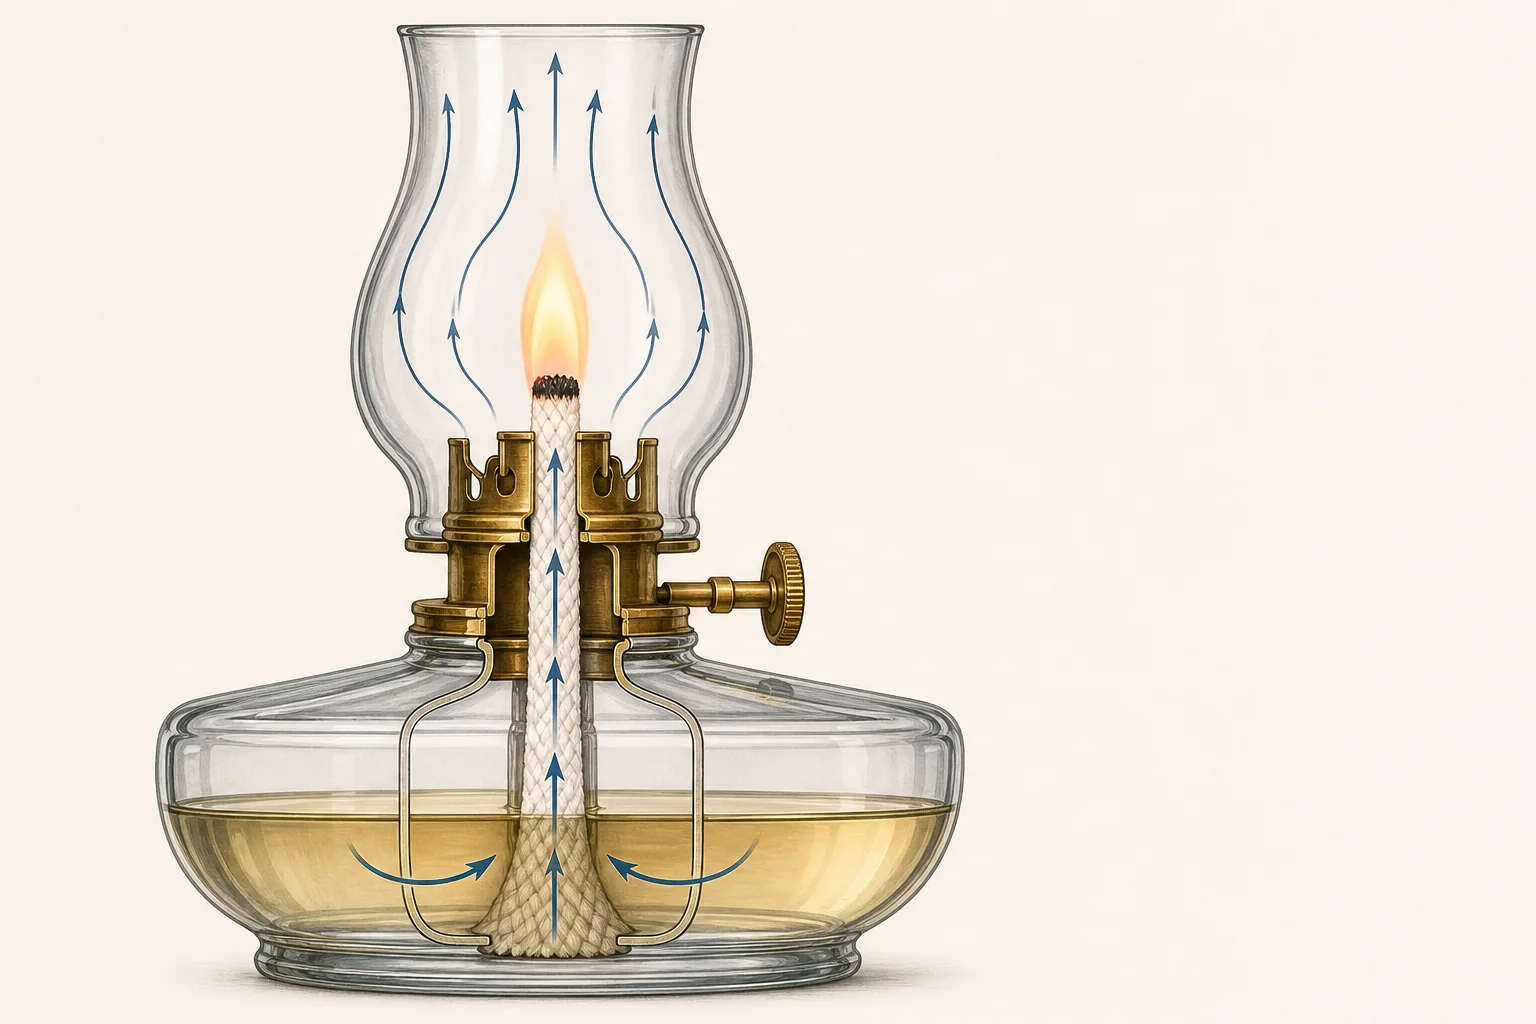
The wick does not burn like a log. It transports fuel. Liquid rises through the tiny spaces in the wick by capillary action. Near the top, heat vaporizes the fuel, and that vapor burns above the wick. A Victorian lamp explainer from Object Lessons describes paraffin oil rising through a cotton wick by this same process.

Cutaway illustration showing fuel rising through a flat wick and airflow moving through a clear oil lamp chimney

The burner and chimney form an airflow system. Cool air enters around the burner, supports combustion, and the warmer gases rise through the chimney. Chimney height, lower opening, throat and bulge all affect that draft. A glass cylinder that happens to sit on the burner may still be the wrong chimney if its geometry does not suit the flame.

The exposed wick controls fuel delivery. Raising it too far can create an oversized yellow flame, soot and rapid heating. Lowering it too far can make the flame weak or unstable. The goal is not the tallest flame. It is the lowest clean flame that gives the needed light.

How to use an oil lamp step by step

Work in good light before the lamp is lit. Keep the fuel container capped and away from the lighting area as soon as filling is complete.

1. Confirm the approved fuel

Read the lamp and fuel labels. Use only the fuel type the lamp manufacturer specifies, and use a product labeled for the intended setting. Do not improvise with gasoline, alcohol, white gas, paint thinner or another volatile liquid.

If an old lamp has no instructions and still contains an unknown liquid, do not mix in new fuel. Have the lamp identified and cleaned before use. Appearance and odor are not a reliable way to identify a fuel.

2. Place the lamp on a stable surface

Set the lamp upright on a level, heat-resistant surface where it cannot be bumped. Clear paper, fabric, curtains, decorations and other combustibles from the area. Check the route above the chimney too. A shelf or lampshade that is safely distant from an electric bulb may sit too close to an open flame.

3. Fill only when the lamp is cold and unlit

Remove the burner if that is how the lamp is filled. Add fuel slowly and stay below the fill limit in the lamp’s instructions. Leave the necessary air space rather than filling to the rim. Wipe the outside and deal with any spill according to the fuel label before lighting.

Reinstall the burner squarely. A threaded burner should engage without cross-threading. A collar or cap should sit firmly without rocking.

4. Saturate and trim the wick

A new or completely dry wick needs time to absorb fuel before it is lit. Wait for the saturation period stated by the lamp or wick maker. Lighting a dry upper section chars it before fuel reaches the flame.

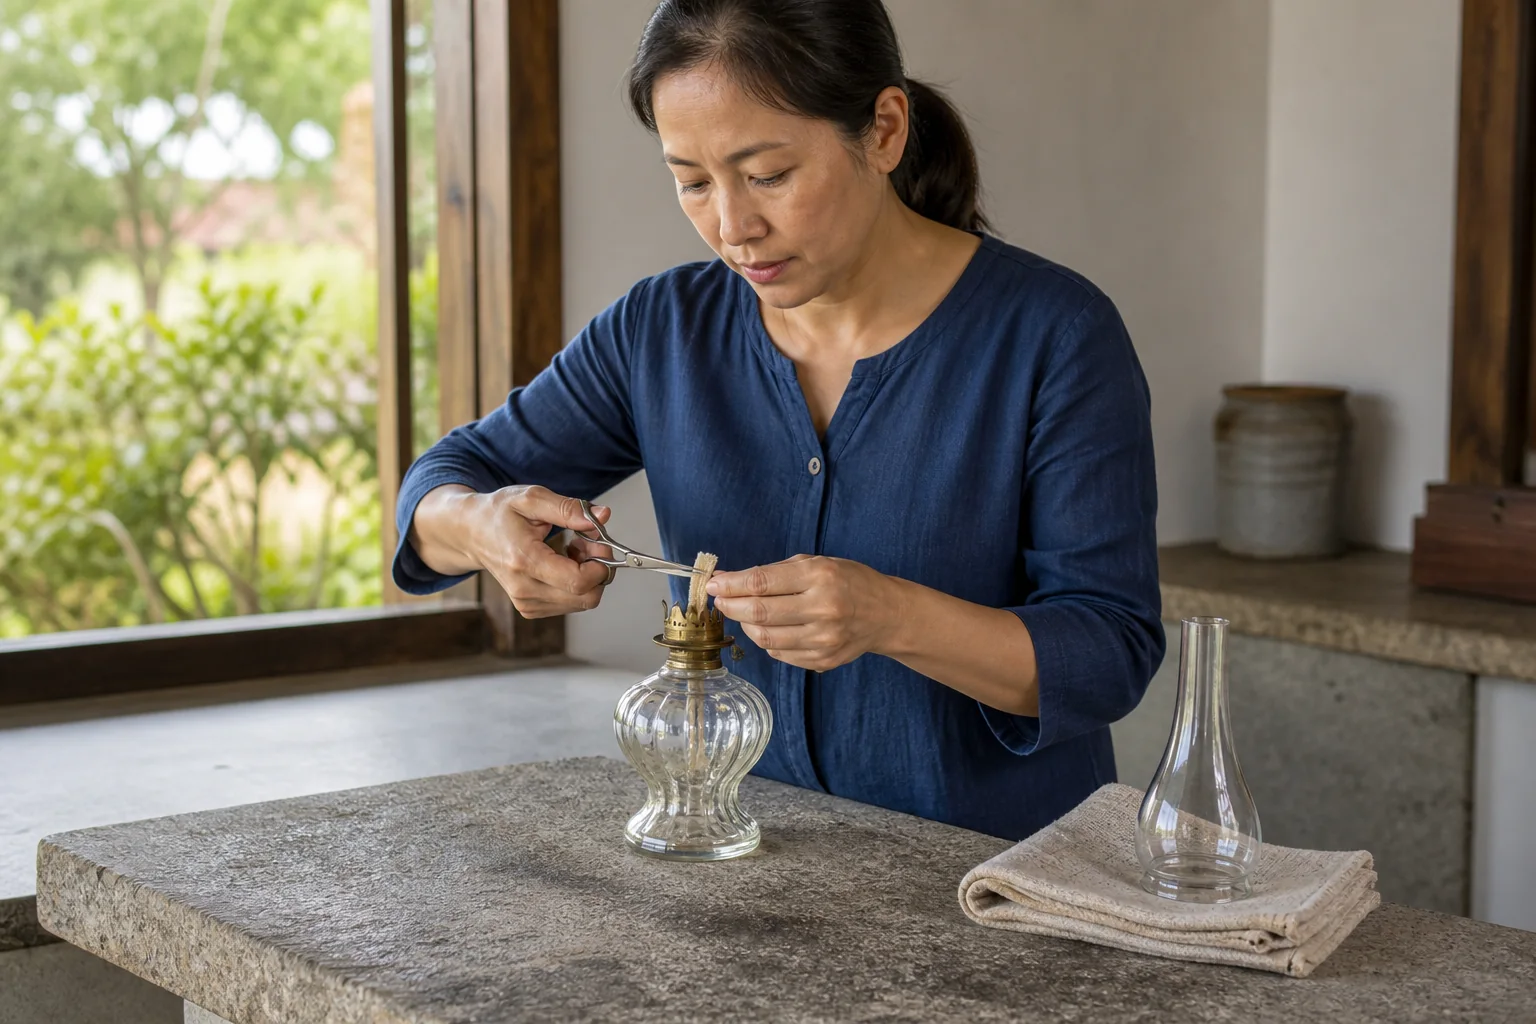
An adult trimming a flat cotton oil lamp wick while the lamp is unlit and the glass chimney rests safely beside it

Trim away hard carbon, loose threads and an uneven top. For many flat-wick burners, a straight or gently rounded top gives an even flame. Do not cut an elaborate point unless the burner instructions call for it. Turn the control knob to confirm that the wick rises and lowers smoothly, then leave only a small edge exposed for lighting.

5. Light the wick using the lamp’s designed access

Some flat-wick lamps are lit with the chimney removed. Others provide access through the burner gallery. Use the method intended for the lamp. Bring a long match or lighter to the exposed wick without leaning loose clothing or hair over the burner.

Replace the chimney in its gallery carefully if it was removed. Do not force glass into spring clips or a base opening. Make sure the chimney is centered and stable before adjusting the flame.

6. Lower the flame until it burns cleanly

Watch the lamp for the first several minutes. Lower the wick if the flame stretches high, pulses, smokes or leaves soot on the chimney. A modest flame is easier on the wick and glass than a high one.

If the burner or chimney begins to behave abnormally, extinguish the lamp. Do not keep turning the wick higher to overcome a dirty burner, wrong chimney, poor wick fit or unsuitable fuel.

7. Extinguish and cool the lamp

Use the lamp’s snuffer or lower the wick according to its instructions. Do not blow down into a hot chimney unless the maker specifically directs that method. Confirm that the flame is fully out, then leave the lamp undisturbed until the burner and glass are cool.

Never refill a burning or hot lamp. Never carry it from room to room while it is lit.

Oil lamp safety rules that deserve more attention

An open-flame lamp combines fire, hot glass and a liquid that can be harmful if swallowed or aspirated. Safe use depends on controlling all three.

Keep lamp oil away from children and pets

Lamp oil can look like a drink, especially when it is clear or stored in an inappropriate container. The U.S. Consumer Product Safety Commission has warned about child poisonings from lamp oil, including cases involving decorative lamps. Keep fuel in its original labeled, child-resistant container, locked or stored high and out of sight. Never transfer it to a beverage bottle.

If lamp oil is swallowed, it can enter the lungs and cause serious injury. In the United States, contact Poison Control at 1-800-222-1222 or use its online service. The Poison Control lamp oil guidance explains why aspiration is the central risk. Follow local poison-control or emergency guidance outside the United States. Do not induce vomiting unless a medical professional directs you to do so.

Treat the chimney and burner as hot surfaces

Clear glass does not look hot. Keep hands, cords, fabric and shade materials away from the chimney during use and cooling. Do not place cold liquid on hot glass, set hot glass on a wet surface, or use a cracked chimney.

Ventilation requirements vary with the lamp, fuel, room and local guidance. Use the lamp only in the setting allowed by its instructions. An oil lamp is not a substitute for approved permanent indoor lighting or heating equipment.

Stay with the flame

Do not leave an oil lamp burning while sleeping or when nobody is in the room. Keep it out of traffic paths and away from pets. If the lamp is being used during a power outage, place it before the room becomes dark so cables, furniture and exits remain clear.

Wick, flame and smoke troubleshooting

Extinguish the lamp before correcting a persistent problem. Let the glass and burner cool before touching them.

Symptom考えられる原因Safe next check
Black soot on the chimneyWick too high, uneven wick, restricted air or wrong chimneyLower the flame; when cool, trim the wick and clear burner air holes
Flame higher on one sideCrooked wick, ragged edge or burner misalignmentExtinguish, cool and trim the wick level; confirm the burner sits square
Flame shrinks or goes outDry wick, wick set too low, poor fuel flow or unsuitable wick fitLet the wick saturate; confirm the correct wick and approved fuel
Wick will not moveCarbon buildup, wrong wick width or damaged gearDo not force the knob; service or replace the wick mechanism when cool
Chimney overheats or rattlesIncorrect chimney base or draft geometry, unstable gallery or flame too highExtinguish and verify the specified chimney dimensions and mounting
Strong fuel odorSpill, leak, loose burner or unsuitable use environmentExtinguish, ventilate as appropriate, check for leaks and follow the fuel label

Cleaning soot without fixing the cause only resets the symptom. A recurring black band on the glass usually calls for a wick, airflow, fuel or chimney check.

How to choose a replacement oil lamp chimney

A replacement chimney has two jobs: it must mount securely and it must create the draft the burner was designed to use. Shape is functional, not merely decorative.

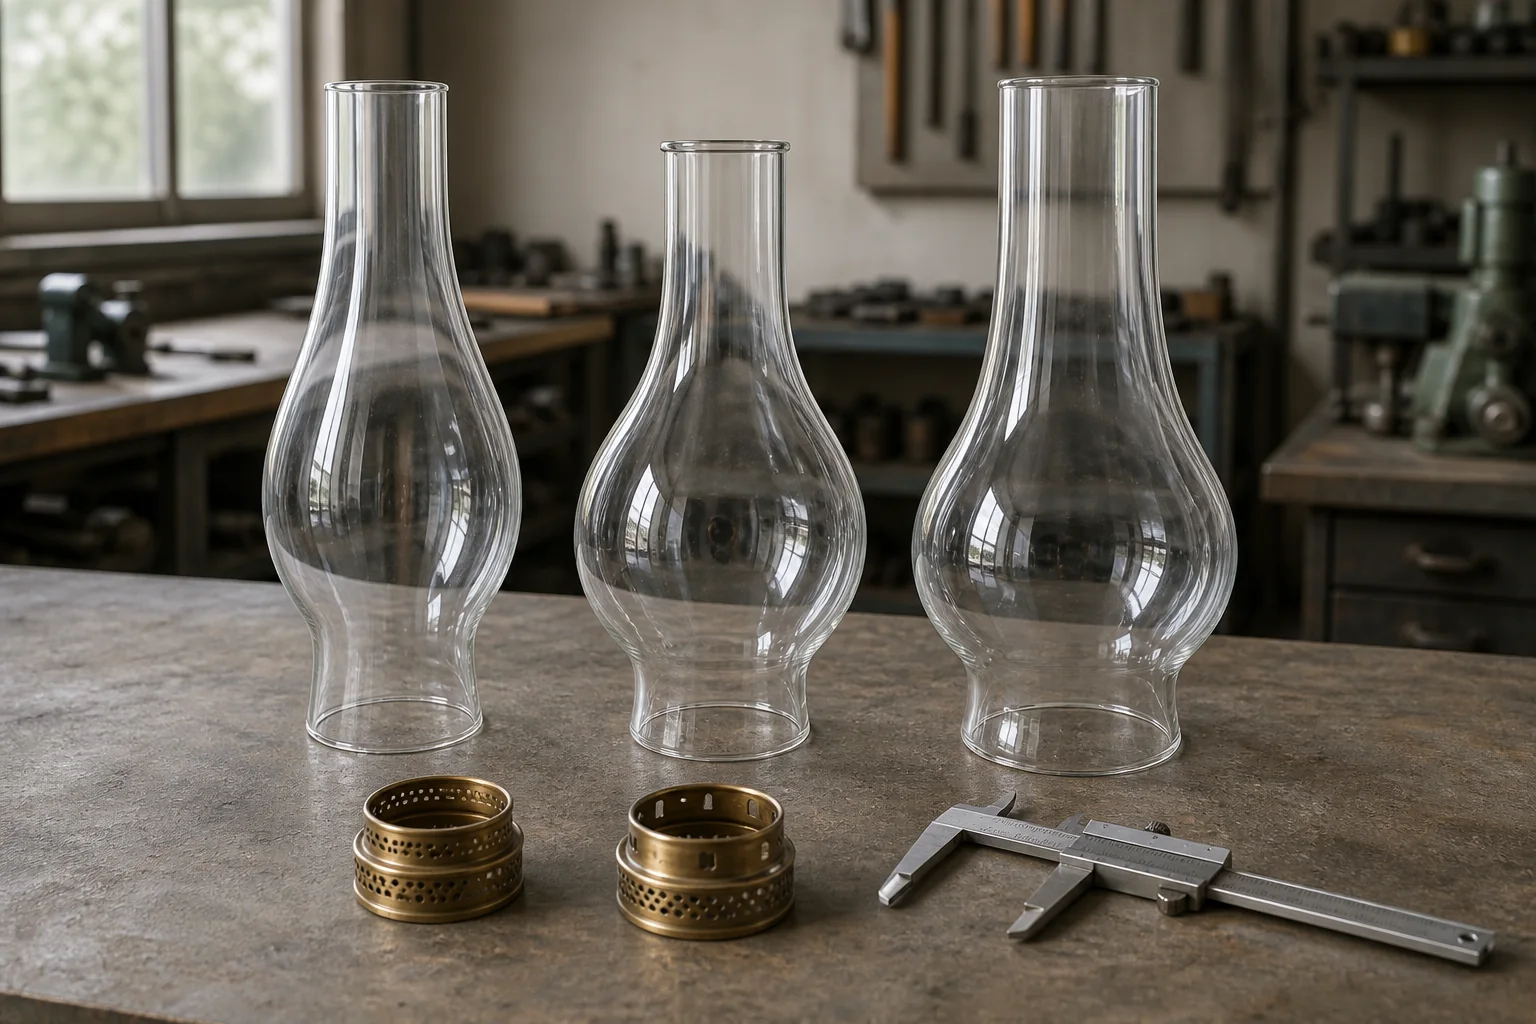
Three clear oil lamp chimneys with different base openings and profiles beside burner collars and a caliper on an inspection bench

Measure the bottom opening first

Measure the chimney’s outside diameter at the point retained by the burner gallery. Also record the gallery’s inside opening and how it holds the glass. Do not round a close measurement to a familiar retail size. A chimney that is too small can fall through or sit loosely; one that is too large can bind or fail to seat.

日本の glass lamp shade measurement guide explains how to record a retained opening consistently. For an oil lamp, add the burner maker and model whenever they are visible.

Record height, bulge and throat

Next measure overall height, maximum outside diameter and the narrowest throat area. Photograph the chimney straight from the side, with a ruler or caliper in the same plane. A side profile helps distinguish a straight chimney from a bulbous, shouldered or constricted pattern.

Do not select by height and base diameter alone. Two chimneys can share those measurements but create different airflow because their throat and bulge differ.

Check glass condition and intended use

Use a chimney sold for the lamp type and heat exposure. Ordinary decorative glassware is not a substitute. Reject a part with a crack, severe chip or base that has to be forced into the gallery.

JX’s oil lamp glass shades page shows common chimney and hurricane-shade directions. A product image is a starting reference, not proof of compatibility. Final selection still depends on dimensions, burner geometry and the lamp maker’s requirements.

Care and storage after the lamp has cooled

Remove loose soot with a soft cloth and clean the chimney using the method recommended for that glass. Avoid sudden temperature changes. Dry the chimney fully before reassembly.

Trim only the charred wick edge. Repeatedly cutting away clean material shortens wick life without solving airflow or fuel problems. If the weave is stiff, contaminated or too narrow for the burner, replace it with the specified size.

For storage, extinguish the lamp, allow it to cool, and follow the fuel and lamp instructions for draining or retaining fuel. Cap the fuel in its original container. Store the lamp upright where it cannot be tipped, and protect the chimney from impact without trapping moisture against it.

Frequently asked questions

オイルランプは室内で使用できますか?

Only if the lamp and fuel are labeled or instructed for indoor use and local rules allow it. Provide the ventilation and clearances specified by the maker, keep the lamp attended, and do not use it as a heater. If the model or fuel is unknown, do not assume indoor use is acceptable.

オイルランプにはどのオイルを入れればよいですか?

Use only the fuel type approved by the lamp manufacturer. Traditional lamps may be designed for a particular lamp oil or kerosene grade, but those terms are not interchangeable across every burner. Never substitute gasoline, alcohol, white gas or an unlabeled liquid.

オイルランプの芯はどのくらいの時間浸しておくべきですか?

Follow the wick or lamp instructions. The wick should be fully saturated before lighting, and a new or dry wick takes longer than one that has remained in the correct fuel. If no reliable instruction exists, identify the burner before using it rather than guessing.

芯の高さはどれくらいにすべきですか?

Expose only enough wick to light a small flame, then adjust downward or upward gradually. The correct setting produces a steady flame without smoke or soot. A tall flame is not a target and can overheat the burner and chimney.

Why is my oil lamp smoking?

The wick may be too high, crooked or carbonized. Restricted burner air holes, unsuitable fuel or the wrong chimney can also change combustion. Lower the flame first. If smoke continues, extinguish the lamp, let it cool and inspect the whole fuel, wick, burner and chimney system.

Can an oil lamp burn without a chimney?

Some open wick devices are designed without one, but a lamp built for a chimney should use the correct chimney. The glass protects the flame and helps establish the burner’s airflow. Operating that lamp without it can produce an unstable or smoky flame.

Why does the oil lamp flame go out?

Common causes include a dry or undersized wick, the wick being set too low, poor movement through the burner, unsuitable fuel, blocked air passages or an incorrect chimney. Do not respond by raising the wick dramatically. Extinguish and check one cause at a time.

When should an oil lamp chimney be replaced?

Replace a chimney that is cracked, severely chipped, unstable in its gallery or known to be the wrong size or profile. Persistent overheating, rattling or soot may also justify checking chimney compatibility, although the wick, fuel and burner should be inspected at the same time.

Confirm the burner and chimney before ordering a replacement

For a replacement review, send the burner maker or model, chimney base diameter, overall height, maximum diameter, side-profile photo and required quantity. Add a close photo of the gallery and one image showing the complete lamp. These details are more useful than a description such as “standard hurricane glass.”

使用する replacement glass shade finder to organize the measurements, or send the dimensions and photos for manufacturing review. Compatibility, thermal behavior and final fit still require review for the specific lamp.

共有する:
JXランプシェード技術チーム

JXランプシェード技術チーム

ガラスランプシェード技術エンジニア/技術コンテンツスペシャリスト

ガラスランプシェードプロジェクトのための技術的な内容サポート(ガラス素材の選定、成形プロセスの指導、表面処理の提案、耐熱性の考慮、品質検査のポイント、カスタム照明部品の応用を含む)。.

<?php return ob_get_clean(); }add_shortcode('jx_lampshade_engineer_card', 'jx_lampshade_engineer_card_shortcode');

関連記事:

よくある質問

塩城晶新ガラス製品株式会社は、専門的なガラスメーカーです 1999年に設立されました。自社の生産拠点とオフィスエリアは48,430平方フィート(約4,500平方メートル)以上あり、設計、製造、品質管理、輸出サービスを統合しています。.

幅広い種類の製品を製造しています。 オーダーメイドガラスランプシェード  吹きガラスランプシェード、機械プレスガラスランプシェード、ホウケイ酸ガラスランプシェード、遠心ガラスランプシェードなどを含みます。OEMおよびODM生産に対応しており、様々な用途や業界向けに提供しています。.

はい、当社は完全なOEMおよびODMカスタマイズサービスを提供しています 含まれる内容:

  • カスタム製品設計およびエンジニアリング
  • 社内金型開発
  • ロゴ印刷およびブランディング
  • 表面処理および仕上げ
  • カスタマイズされたパッケージングソリューション

はい、当社のデザインチームはお客様のコンセプトからカスタムガラス製品を開発できます。. お客様のアイデア、参考サンプル、または機能要件に基づき、専門的なデザインサービスを提供します。技術図面は不要です。.

当社のプロセスは量産前に品質を確保します。

お客様によるデザイン確認

自社施設での金型開発

承認用サンプルの製作

お客様によるテストとフィードバック

最終サンプル承認後のみ量産を開始します

私たちは提供します 安全な国際配送のための包括的なカスタムパッケージ:

  • 保護用の内側梱包材
  • 輸出用グレードの段ボール箱
  • カスタムカラーボックスと小売用パッケージ
  • ラベル印刷とブランディング
  • 国際配送基準に合わせて設計されたパッケージ
  • 各生産段階での検査
  • 科学的な品質管理手順
  • 各ロットの出荷前検査
  • 国際輸出基準への準拠
  • 認証された品質管理システム

私たちは運営しています 経験豊富な作業員による複数の生産ライン, これにより、あらゆる規模の注文に対して安定した大量生産が可能です。私たちの施設は、小ロットから大量注文まで、一貫した品質と信頼できる納期を保証します。.

リードタイムは複雑さや数量によって異なります:

  • サンプル生産:通常2~4週間
  • 量産:サンプル承認後にスケジュールされます
  • 具体的な納期はご注文内容に基づきご案内いたします

当社は日本を含む全世界120以上の国と地域に輸出しています, 例として:

  • 日本(日本国内)
  • ヨーロッパ(イギリス、ドイツ、フランスなど)
  • アジア太平洋市場
  • 中東
  • アフリカ
  • オセアニア(オーストラリア、ニュージーランド)

当社は包括的なグローバル流通ネットワークを維持しています。.

見積もり依頼 一緒に働く準備はできていますか?私たちとプロジェクトを作りましょう!

見積もり依頼
トップへスクロール
見積もり依頼