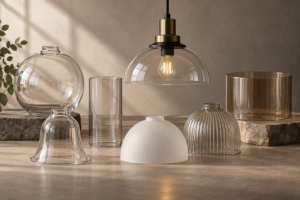
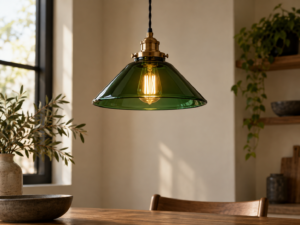
直接的な回答: カットガラスの天井照明シェードは、天井に取り付けられる器具(フラッシュマウント、セミフラッシュ器具など)用の多面体ガラスカバーです。, シャンデリアやペンダント天井ローズなどにも使用されます。これらは天井キャノピーカバー、ギャラリーリング、またはシャンデリアカップフィッティングで取り付けられます。天井に設置されることで、床やテーブルランプのシェードとは異なる強いプリズム効果が天井や上部の壁に生まれます。.
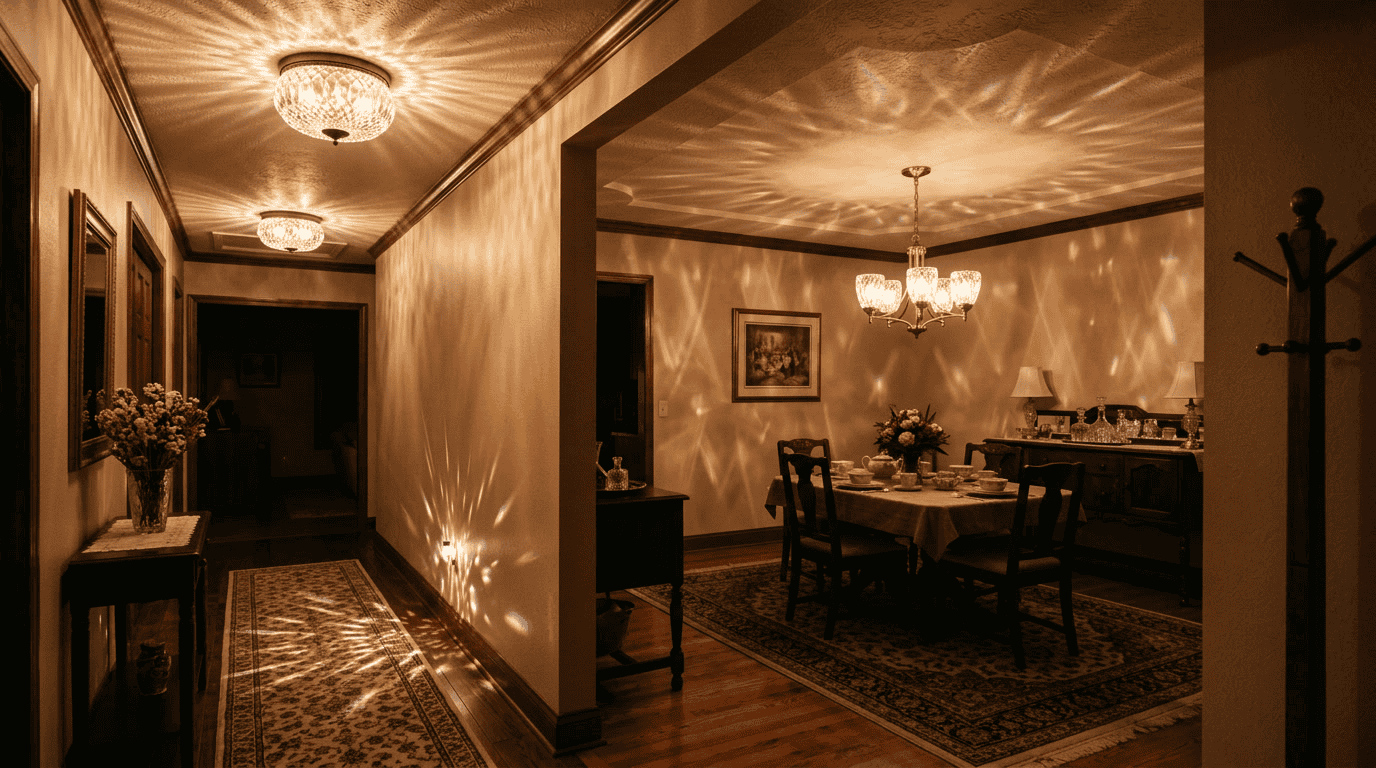
天井取り付けのカットガラスシェードは、床やテーブルランプとは異なる照明体験を生み出します。天井からの位置により、光は多面体ガラスを通して下方の床や家具に投射され、さらに光源からガラスを通して天井方向にも上向きに照射されます。天井のカットガラスシェードによるプリズム模様は部屋全体に同時に投影され、住宅や商業空間で最もインパクトのあるカットガラスの使い方となります。.
技術的な要件も床やテーブルランプのシェードとは異なります。天井取り付けの場合、フィッター金具は重力下でシェードを逆さまや横向きに支える必要があり、ギャラリーリングが下部にない場合は金具が緩んでもシェードを受け止めることができません。.
天井器具の種類と対応するカットガラスシェードの形状
すべての天井器具が同じシェード取り付け方法を使用するわけではありません。器具の種類によって使用できるシェードの形状やフィッターのタイプが決まります。.
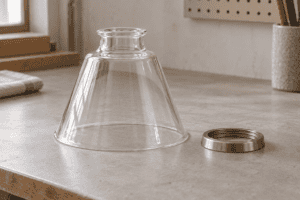
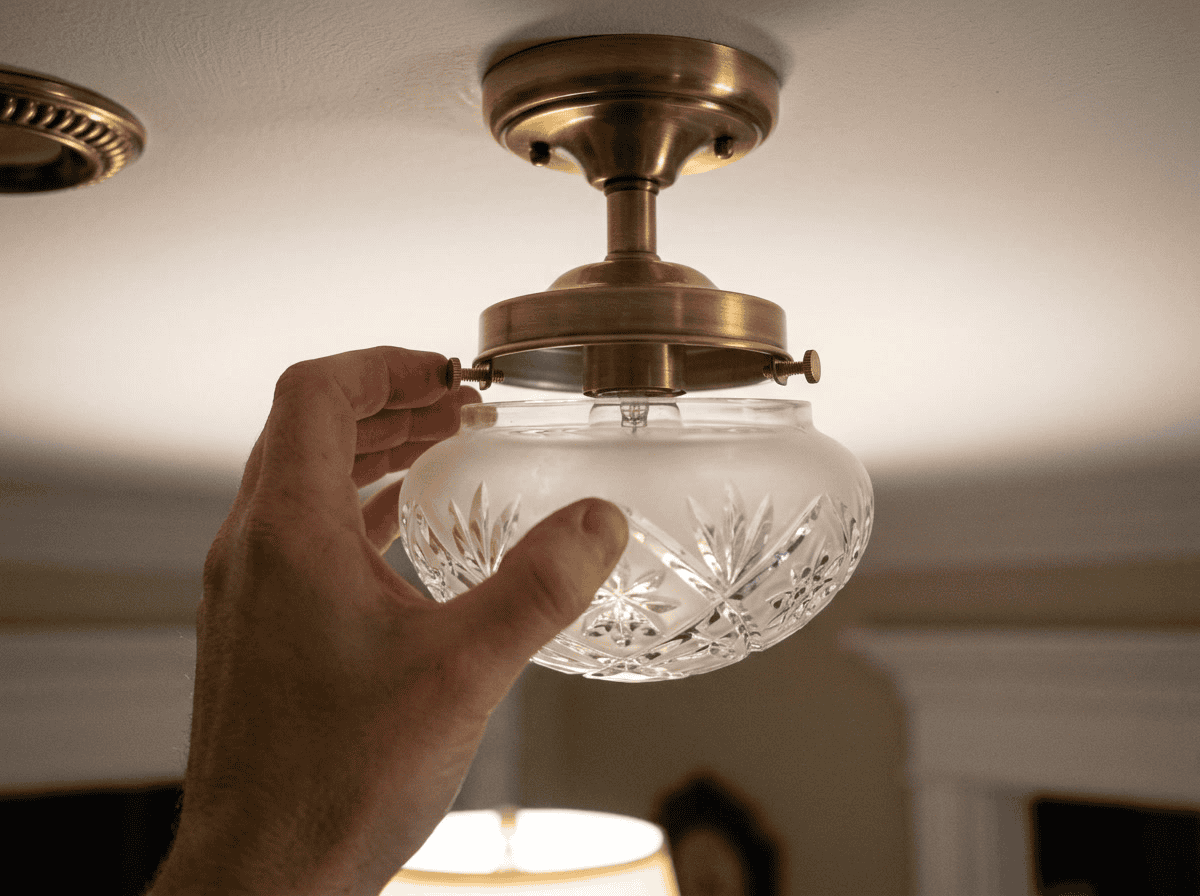
フラッシュマウント天井器具: 器具は天井に直接取り付けられ、隙間がありません。カットガラスのフラッシュマウントシェードは通常、ボウル型やドーム型で、開口部が上向き、ガラス本体が部屋に向かって下向きになります。ボウル型は下方の光を集め、側面の多面体ガラスから光が横方向に投射されます。フラッシュマウントシェードはネジ付きカラー、リムのセットスクリュー、または上部のラッチ付きギャラリーカラーで取り付けられます。古い住宅のフラッシュマウント天井照明で非常によく交換が必要となる部品です。.
セミフラッシュ/天井近接器具: フラッシュマウントに似ていますが、短いステム(2~8インチ)があり、シェードが天井から少し下がります。隙間があることで天井面にアップライトが生まれます。セミフラッシュのカットガラスシェードは、ステムカラーから吊り下げられるベル型やドラム型が多いです。セミフラッシュ器具はフラッシュマウントより機械的に複雑なので、交換用シェードを指定する際はステムの長さやカラー直径を確認してください。.
シャンデリアのボベッシュとカップ: シャンデリアは小さなカットガラスカップ(ボベッシュ)や、個々の電球の上に大きなシェードカップを使用します。これらは最も広く生産されているカットガラスの天井部品で、伝統的なシャンデリアから現代のマルチライトペンダントまで幅広く見られます。ボベッシュは電球ソケット用の中心穴がある小さなディスクで、シェードカップは小さなベル型やコーン型です。どちらもセットスクリュー、プレスフィット、またはカラーねじで取り付けられます。.
ペンダント天井シェード: ペンダントシェードは天井ローズやキャノピーからコード、チェーン、ロッドで吊り下げられます。カットガラスのペンダントシェードは通常、グローブ型、ベル型、円筒型です。テーブルやフロアランプのペンダントシェードとは異なり、天井ペンダントは通常、頭の高さやそれ以上に吊り下げられ、光源がシェード越しに下から見えることが多いです。.
| 器具の種類 | シェード形状 | 標準直径 | 取り付け方法 |
|---|---|---|---|
| フラッシュマウント | ボウル/ドーム | 8~16インチ | カラー固定、セットスクリュー、またはギャラリー |
| セミフラッシュ | ベル/ドラム/グローブ | 8〜14インチ | ステムカラーとセットスクリュー |
| シャンデリアカップ | ボベッシュ/小型ベル | 2〜5インチ | センターホールプレスフィットまたはセットスクリュー |
| シャンデリアシェード | 小型ベル/コーン | 4〜8インチ | カラークリップまたはセットスクリュー |
| ペンダント天井 | グローブ/ベル/シリンダー | 8~16インチ | ギャラリーリングからのペンダントチェーン |
天井用カットガラスパターン
天井取付けのカットガラスには、床やテーブル用とは異なる視覚的要件があります。天井シェードでは、光源がガラスの上または後ろにあり、見る人は下からシェードを見上げます。これにより、最も目立ち、効果的なパターン要素が変わります。.
天井シェードで最も重要な点:
- 光の透過性:ファセットパターンがどれだけ多くの光をガラスを通して通すか(透過性が高いほど部屋が明るくなる)
- 反射:ファセットがどれだけ多くの光を下方向に反射するか(照明器具の下での作業照明の効果に影響)
- サイドスキャッター:ファセットが横方向にどれだけ光を投射するか(プリズム状の壁や上部壁の効果に影響)
ダイヤモンドクロスハッチ: 天井シェードに最適 — ガラスパネルを通して良好な光透過性があり、プリズム効果のための十分なサイドスキャッターもあります。天井直付けやセミフラッシュ天井用途に最も汎用性の高い選択肢です。.
ホブスター: ダイヤモンドよりも視覚的密度が高い — 単位面積あたりのファセット数が多いため、より多くの光の屈折が得られますが、全体の透過率はやや低くなります。雰囲気重視で照度よりも装飾効果を求める天井照明器具に最適です。.
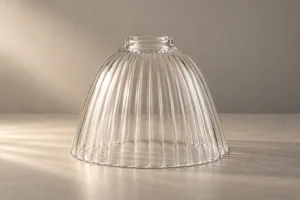
フルーテッド: 天井シェードに適した良好な指向性透過 — 垂直のフルートが光を主に下方と側方に導き、ダイヤモンドよりも全体的な散乱が少なくなります。より集中的な下向き照明が必要な天井用途に適しています。.
細かいプレスダイヤモンド: コストを重視する天井用途に最適な選択肢です。高品質な金型仕上げの細かいパターンのプレスダイヤモンドは、点灯した天井器具を下から見た場合、カットガラスと見分けがつきにくいです。.
ホブスター(扇形カットの縁取り付き): フォーマルなダイニングルームや玄関の天井照明器具に時代に合ったデザインです。複合パターンが点灯時に豊かな視覚効果を生み出します。.
カットガラス天井シェードのサイズ選び
天井シェードのサイズ調整には精密さが求められます。シェードは固定された天井金具と正確に合わなければなりません。テーブルランプのようにおおよそのフィットでも許容される場合とは異なり、天井シェードが正しくフィットしない場合は落下します。.
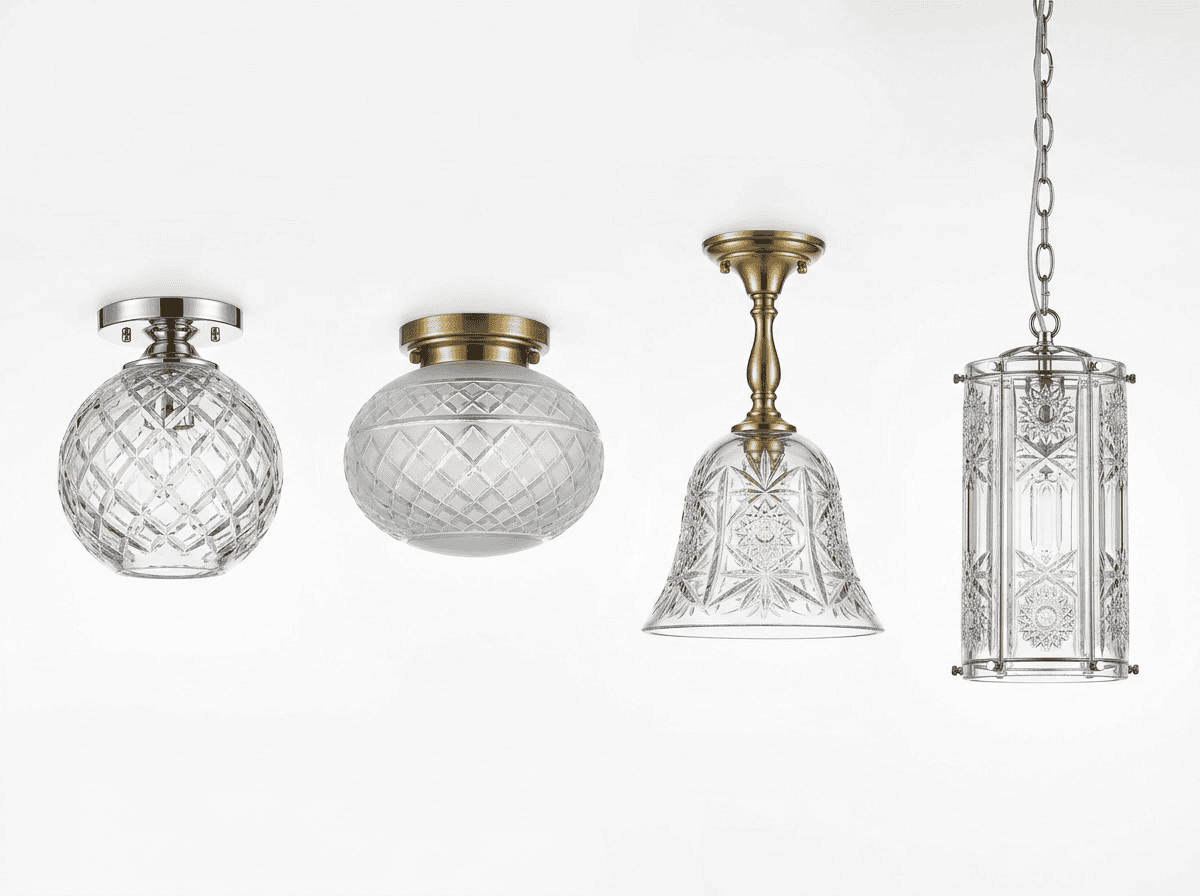
天井シェードの重要な寸法:
| 測定 | 測定する項目 | 重要な理由 |
|---|---|---|
| フィッター開口径 | シェード開口部の内径 | 天井器具のカラーやリングと一致する必要があります |
| フィッターリップ/縁の寸法 | 開口部周囲の縁の幅 | 器具の金具に正しく座る必要があります |
| シェード外径 | シェード本体の最も広い部分 | 天井からの見た目のバランスとクリアランス |
| シェードの深さ/高さ | フィッター開口部からシェード底部まで | シェードが天井からどれだけ下がるかを決定します |
| フィッター部の壁厚 | 縁部分のガラス厚 | シェードが金具をどれだけしっかり掴むかに影響します |
既存のシェードを交換する場合: 既存シェードの寸法が仕様となります。可能であれば壊れたシェードを測定し、または天井器具の金具を直接測定してください。器具のフィッター開口部の直径が固定された制約です。.
新しい天井器具の場合: シェードの寸法は器具仕様の一部です。メーカーの仕様書でシェードの互換性を確認してください。多くの天井器具は特定のシェードファミリー用に設計されています。.
日本の 天井器具の概要(ウィキペディア), フラッシュマウントおよびセミフラッシュ天井照明は、第二次世界大戦後の日本の住宅建築において標準となりました。これは、天井高の低い住宅設計がペンダント型器具を非実用的にしたためです。このため、標準化されたフラッシュマウントガラスシェードの需要が高まり、現在でも最も一般的なフラッシュマウントサイズの交換用プレスガラスシェードが広く入手可能です。.
天井カットガラスシェードの取り付けと安全性
天井シェードには、フロアランプやテーブルランプのシェードにはない安全要件があります。重力が取り付け作業に対して逆方向に働きます。.
フィッターの強度が重要です。. 天井シェードが緩むと、天井の高さから下にあるものの上に落下します。天井カットガラスシェードを取り付ける前に:
- シェードのフィッターリムに欠けやひび割れがないか確認してください。損傷したフィッターリムは天井金具のストレスで破損する可能性があります。
- 器具の取り付け金具が良好な状態であることを確認してください。摩耗または腐食したセットスクリューは新しいシェードを取り付ける前に交換してください。
- 完全に締め付ける前にフィット感をテストしてください。シェードはフィッターリムの周囲に隙間なく均等に収まる必要があります。
重量制限: 天井器具の金具には明確な重量制限があります。大型のカットガラスボウルシェードは1.5~3kgの重さがあり、シャンデリア用のシェードカップ4個セットはシャンデリア全体の重量に2~4kg追加されます。器具のカバー、ステム、天井ボックスが器具とシェードの合計重量を支えられることを確認してください。より重い取り付けの場合、ファン対応天井ボックス(50kg以上対応)がファン以外の用途でも適しています。.
熱管理: フロアランプのシェードでは熱がシェードから上に逃げますが、天井シェードは電球の上にあり熱を閉じ込めます。特にフラッシュマウントボウルシェードでは電球が密閉されるため重要です。LED電球を使用してください。LEDは白熱電球に比べて発熱が大幅に少ないです。器具がその用途に特別に対応していない限り、密閉型天井シェードで白熱電球やハロゲン電球は絶対に使用しないでください。.
天井器具の取り付けガイドについては、, This Old Houseの天井照明取り付けガイド 天井器具の電気的および構造的要件を解説しています。.
シャンデリアカットガラスシェードカップおよびボベッシュの交換
シャンデリアカップおよびボベッシュは、天井用カットガラス部品の中で最もよく交換されるものです。個々のカップは清掃や電球交換時に破損し、適合する交換品を見つけるには正確な取り付け寸法を知る必要があります。.
標準的なシャンデリアボベッシュのサイズ:
- 直径5cm:小型装飾用シャンデリア、2~3灯器具
- 直径7.5cm:標準的な5~8灯シャンデリア(最も一般的な交換サイズ)
- 4インチ直径:大型シャンデリアや多段式照明器具用
- カスタム:一部のヨーロッパ製やアンティークのシャンデリアは、標準外の寸法を使用しています
取付タイプ:
- センターホールプレスフィット:ボベッシュに中央の穴があり、電球ソケットに差し込んでソケットナットで固定します
- セットスクリューカラー:ボベッシュを電球ソケットアームのカラーにセットスクリューで取り付けます
- スリップリング:ボベッシュにリングがあり、ソケットアセンブリにスライドして取り付けます
シャンデリアカップを交換する際は、すべてのカップを同時に交換することで、1つずつ交換するよりも色や透明度の違いが目立たず、より均一な仕上がりになります。.
全ラインナップと仕様については、, JXランプシェードのカットガラスランプシェード 天井用シェード形状やシャンデリアカップの仕様を含みます。天井用途で最良のプリズム効果を得るには、こちらもご覧ください クリスタルカットガラスランプシェード — 結晶組成は優れたプリズマティック効果を生み出し、特に複数のカップが同時に貢献するシャンデリア用途で顕著である。.
天井用カットガラスシェードの清掃 — 床面やテーブル用シェードよりアクセス・取り外しが難しい場合がある — カットガラスのランプシェードの掃除方法 現状置き清掃と取り外し清掃の両方の技法を含む。.
日本の Houzzのシャンデリア選択ガイド, 直径は、シェードカップを含む全体の器具が視覚的質量に与える影響を含め、テーブルまたは部屋の幅の約半分であるべきである — これは全体の器具に適用される指針である。.
天井カットガラスから生じるプリズマティック効果:部屋別
部屋タイプ別のカットガラス天井シェードのサイズ
| 部屋 | 推奨器具タイプ | シェードの直径 | 調光器は? |
|---|---|---|---|
| エントランスホール | セミフラッシュまたはペンダント | 12〜16インチ | 推奨 |
| ダイニングルーム | カップ付きシャンデリア | 全体器具長さ24–36インチ | 必須 |
| リビングルーム | セミフロアシーブまたはシャンデリア | 14–20インチ | 推奨 |
| ベッドルーム | フラッシュマウント | 10–14″ | 任意 |
| 浴室 | フラッシュマウント(耐湿) | 8〜12インチ | 任意 |
これらのシェードの天井位置は部屋ごとに異なる特定の視覚効果を生み出します:
エントリーホールとエントランスホール: 天井は通常高く、部屋の目的は移行的です—来客が到着し第一印象を形成します。エントリーホールのカットグラス天井照明は、入口体積全体にプリズマティックなパターンを投影します。効果は、エントリーホールの壁と天井が明るい色で、プリズマティックな投影をはっきりと表示する場合に最も劇的です。.
ダイニングルーム: カットグラスのシーリング照明の最も伝統的な適用例は、ダイニングテーブルの上に置かれたカットグラスのカップを備えたシャンデリアで、何世紀にもわたる構成です。ダイニングルームでの使用にはディマーコントロールが不可欠です:タスク照明と周囲の使用には全光、雰囲気のある食事には光量を抑える、低輝度でのカットグラス効果が最も見えやすくなります。.
浴室: カットグラスのフラッシュマウント天井シェードは伝統的な浴室デザインで一般的です。白色または明るいタイル表面へのプリズマティック効果は視覚的に華やかです。浴室では、照明器具の耐湿性が重要です—シェード自体(ガラス)は耐湿性ですが、電気部は湿気のある場所に耐えられる等級でなければなりません。.
寝室: カットグラスの天井照明は、寝室に対して周囲照明と装飾的な特徴の両方を提供します。すりガラスまたは半透明の押出ガラスは、寝室ではより柔らかく、拡散した光を生み出すため好まれることがあります。純粋な透明なカットガラスは、天井位置から近距離で視覚的に強烈になることがあります。.
コファードまたは建築的天井のあるリビングルーム: 建築的天井はカットグラス天井照明から最も恩恵を受けます—プリズマティックな投影が建築要素(梁、コファー、モールディング)と相互作用し、層状の視覚効果を作り出します。.
カットガラス照明の部屋別スタイリングガイダンスの指針について、, Architectural Digestのインテリア照明ガイド は、器具タイプ、シェードの選択、部屋の機能との関係を解説しています。.
よくある質問
交換用のフラッシュマウント天井シェードをどうやって測りますか?
シェードのフィッター開口部(上部の穴)の内径、最大幅の外径、フィッター開口部からシェードの下端までの高さを測定します。取り付け方法も併せて記録してください — シェードがセットスクリュー、ねじ込みカラー、またはギャラリーロックで固定されているかどうか。フィッター開口部の直径が重要な適合寸法です。.
子供のいる部屋でカットガラス天井シェードは安全ですか?
子供がいる家庭では、床置きや卓上のシェードよりも天井取り付けのカットガラスシェードの方が安全です。手が届かないためです。天井シェードの安全性の懸念は取り付け自体にあり、確実な固定が不可欠です。適切に取り付けられたフラッシュマウントおよびセミフラッシュの器具と適切に取り付けられたシェードは、リスクが最小です。.
カットガラス天井シェードを浴室で使用できますか?
適切な器具を選べば可能です。ガラスシェード自体は耐湿性がありますが重要なのは電気器具の耐湿性表示です。浴室では、最低でも“湿気の多い場所”の定格、シャワーエリアには“湿式場所”の定格を持つ器具を使用してください。標準の天井器具は浴室の湿気に適していません。浴室専用または洗面台用の器具を探してください。.
なぜ私のカットガラス天井シェードは前のものより暗く見えるのですか?
考えられる3つの原因:LED電球が前の白熱球より総発光量が少ない(ワット数ではなくルーメン表示を確認)、シェードのファセット内部にほこりが蓄積している(天井シェードの内部ファセットは空気循環でほこりが上がりやすい)、新しいシェードのガラスの透明度や厚さが異なる、のいずれかです。まずシェードを清掃してください — 内部ファセットのほこりが光量を大幅に低下させます。.
引っかかって外れないカットガラス天井シェードをどうやって外しますか?
まず器具の電源を切り、冷えていることを確認します。セットスクリューでの固定の場合は、下からシェードを支えながらセットスクリューを緩めます。カラー固定の場合は、シェードを反時計回りに回しつつ押し上げて外します。ギャラリーロックの場合は、シェードを持ち上げて回転させて外します。シェードが固く引っかかっているように見える場合は、セットスクリューが完全に緩んでいるかを確認してください(複数のスクリューがある場合があります)。決して力を入れてガラスシェードをこじらないでください — 優しく均等な力を加えてください。.
カットガラス天井器具の理想的な天井高はどのくらいですか?
切子ガラス天井照明のプリズマティック効果を発展させ視覚的に広がらせるためには、天井高を最低8フィート以上取ることが推奨されます。低い天井(7–7.5′)は効果を圧縮し、照明器具を居住者の近くに視覚的に引き寄せます。9–10′の天井では、切子ガラス天井灯が最良の効果を生み出します――プリズマティック投影が広がり、部屋全体の環境効果として視認可能になり、天井の一点として集中しません。.
部屋で切子ガラス天井シェードをいくつ使用すべきですか?
天井の照明器具が1つの場合、通常は1つのよく選ばれたシェードが適切です――切子ガラスの天井シェードは焦点のポイントとなり、複数の競合照明器具は視覚的な混乱を生みやすいです。個別の電球カップがあるシャンデリアでは、カップすべてを揃える(通常4–8個)ことで統一感のある視覚表現になります。非常に大きな部屋では、異なる位置に2つまたは3つの切子ガラス照明を設置すると層状のプリズマティック効果を作り出せます。.
結論
切子ガラス天井照明シェードは床用・卓上用とは異なるスケールと視覚的物理法則で作動します。天井の位置は部屋全体に広がるプリズマティック効果を生み出し、他の照明タイプには再現できません。また、頭上の取り付けは安全要件を正確に満たす必要があります。.
選択プロセスは天井照明器具のハードウェアから始まります――取り付けタイプ、フィッターサイズ、耐荷重――そこからシェードの形状、パターン、視覚的性格へと進みます。正しく取り付けられた切子ガラス天井シェードは、適切なLED電球と調光器と組み合わせると、照らす部屋の性格を定義する効果を生み出します。.